Edition of a knowledge capture (generate steps, make modifications, etc.)
- First, from Studio, enter the world in which the capture was made by clicking on it.
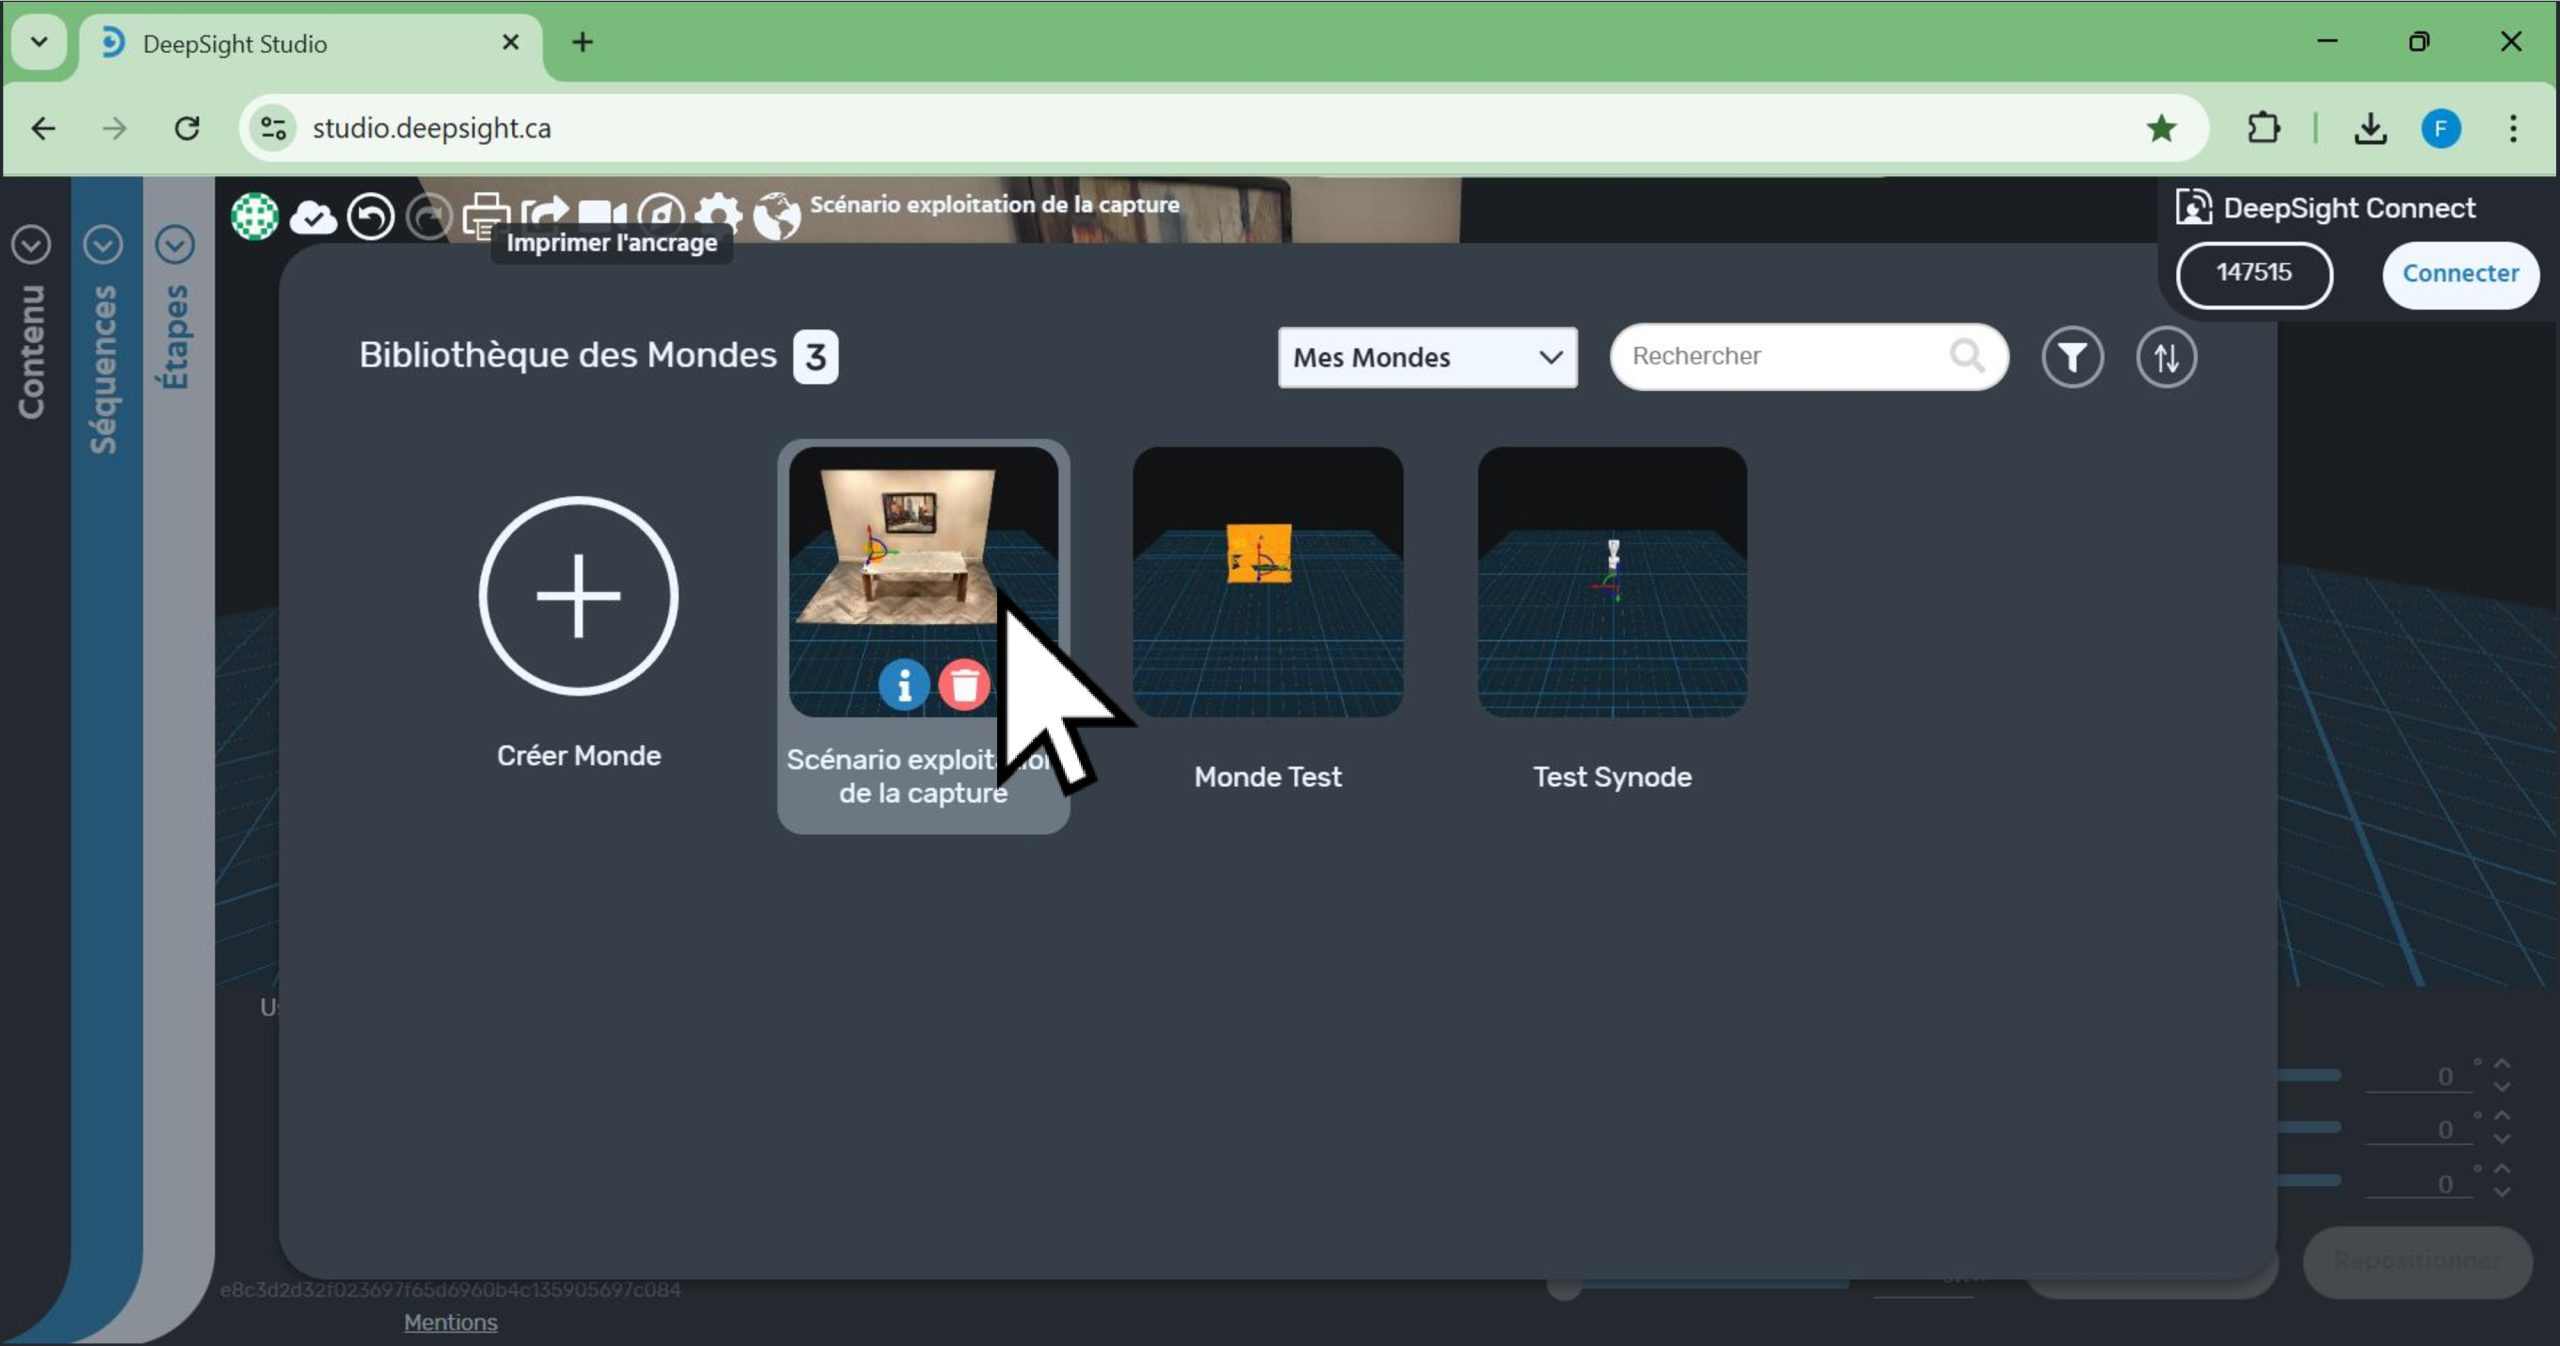
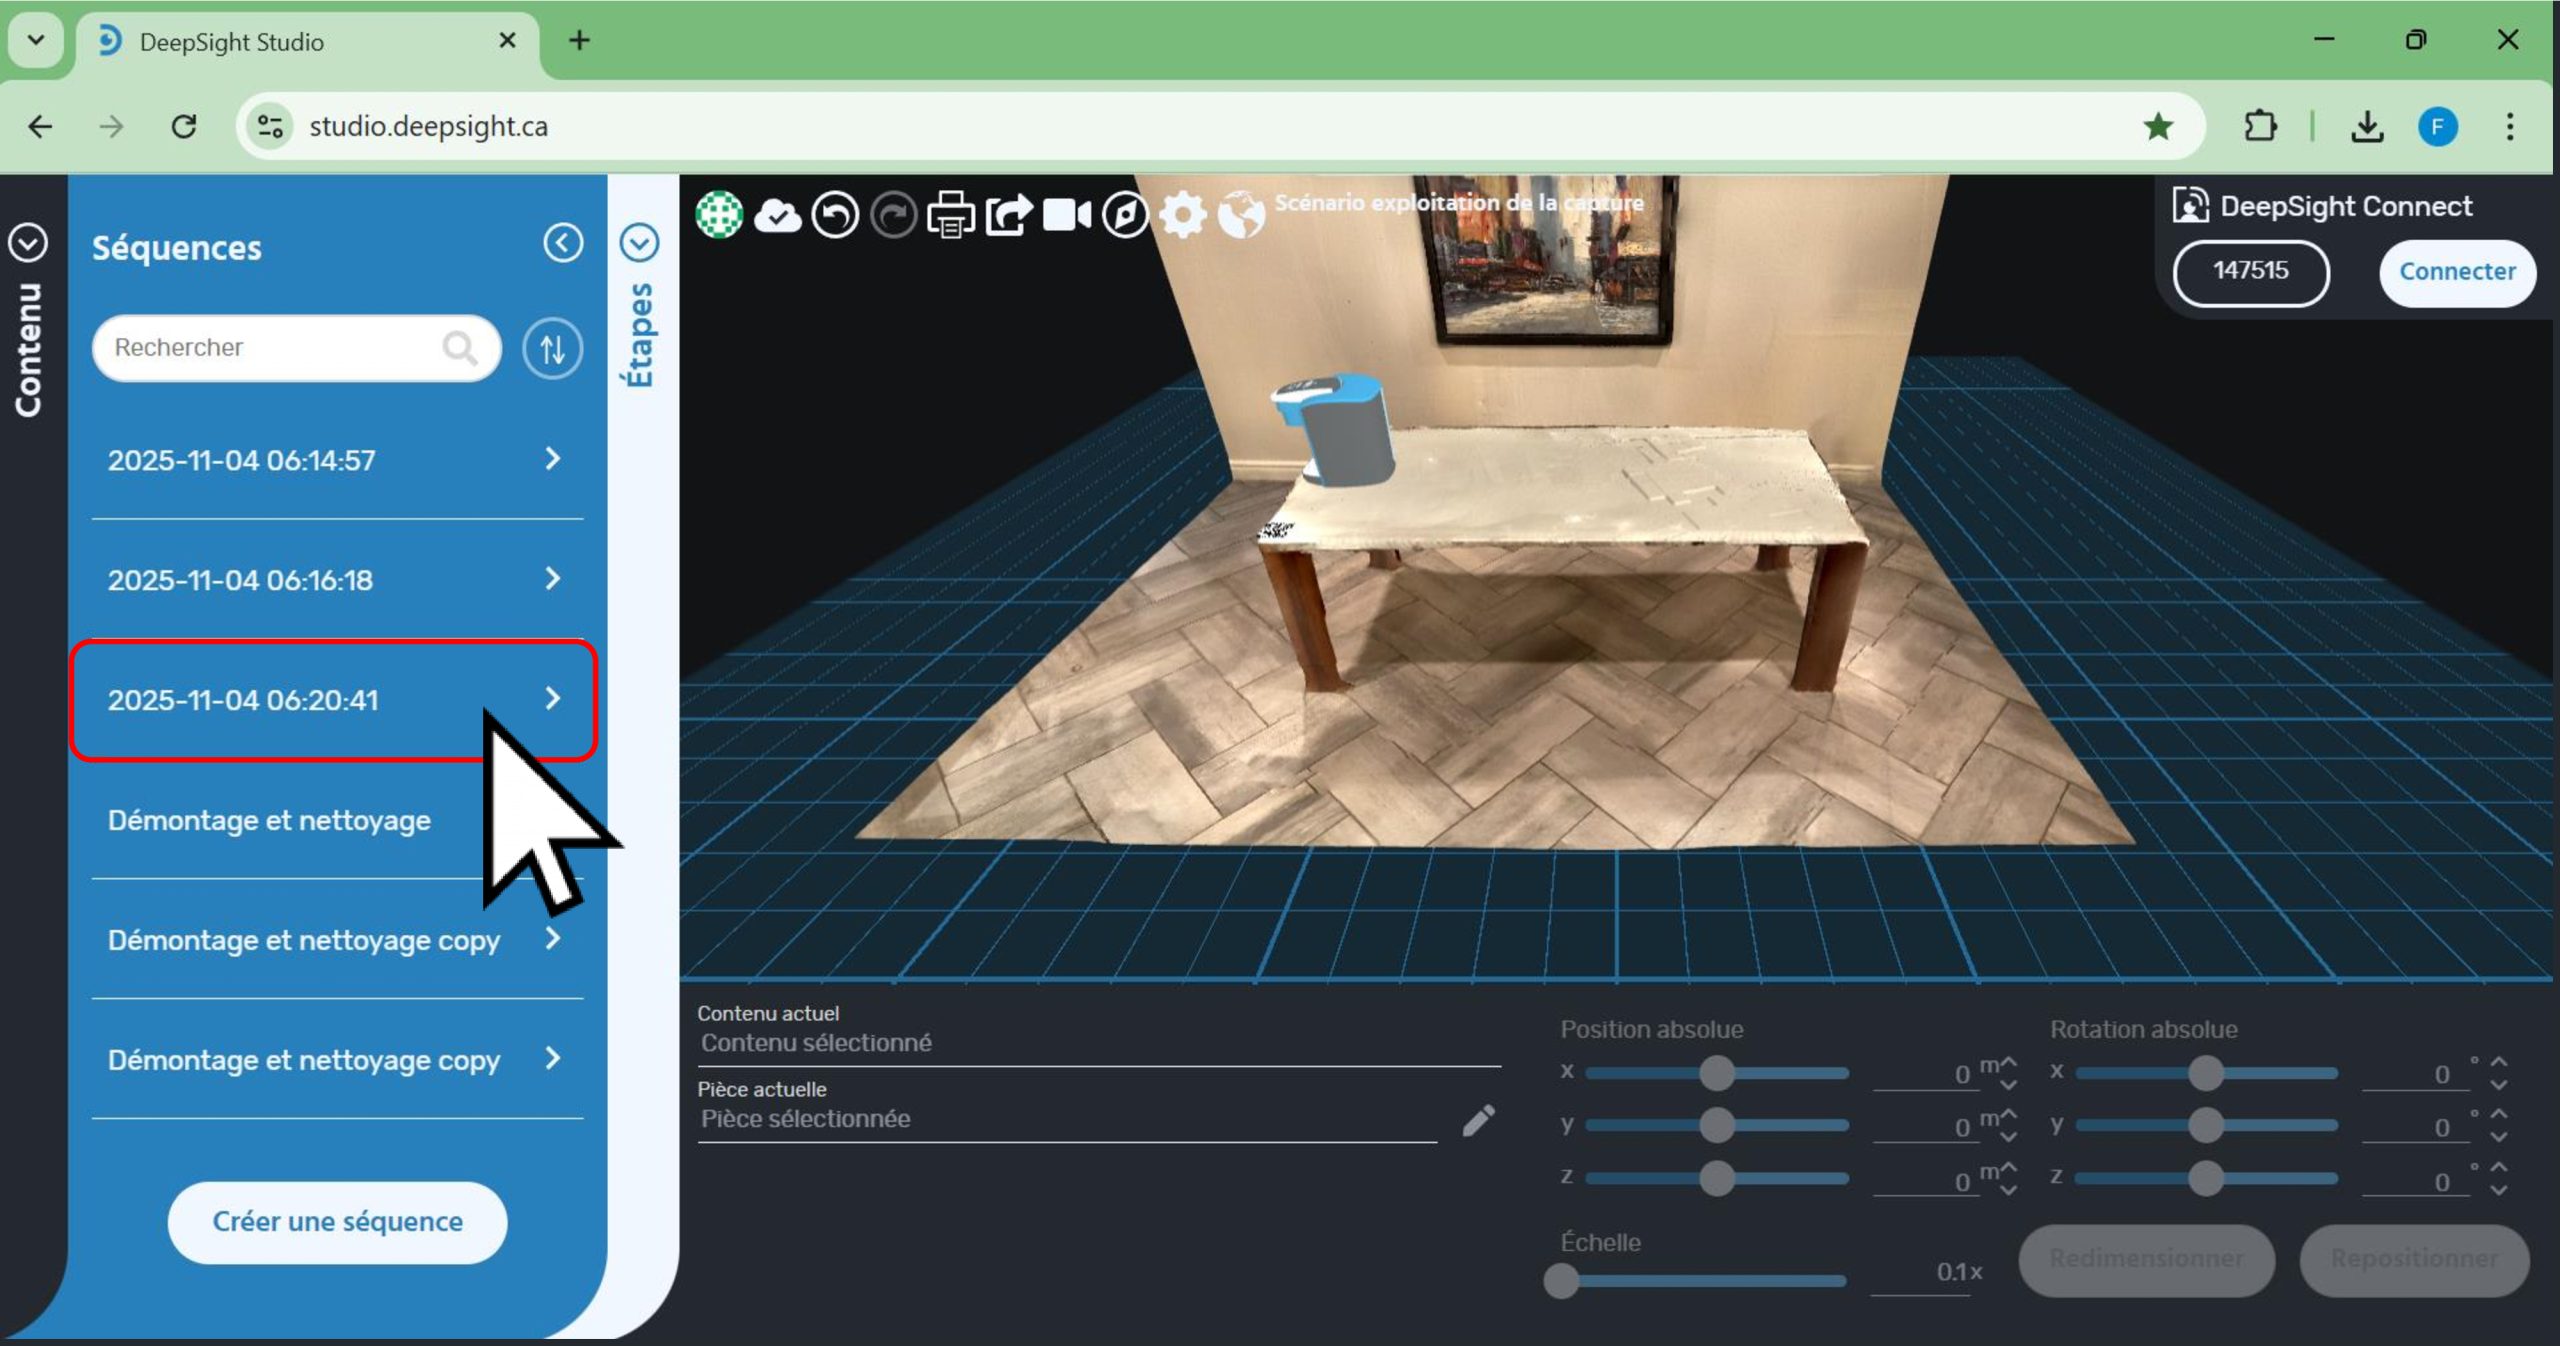
- Next, click on the ‘Sequences’ panel.

- You will see the list of sequences contained in this world appear.
- By default, the expert’s knowledge capture is saved in a new sequence named in the following format: ‘YYYY-MM-DD HH:MM:SS’, which corresponds to the date and time when the capture was made.
- Click on the sequence corresponding to the capture you want to use.
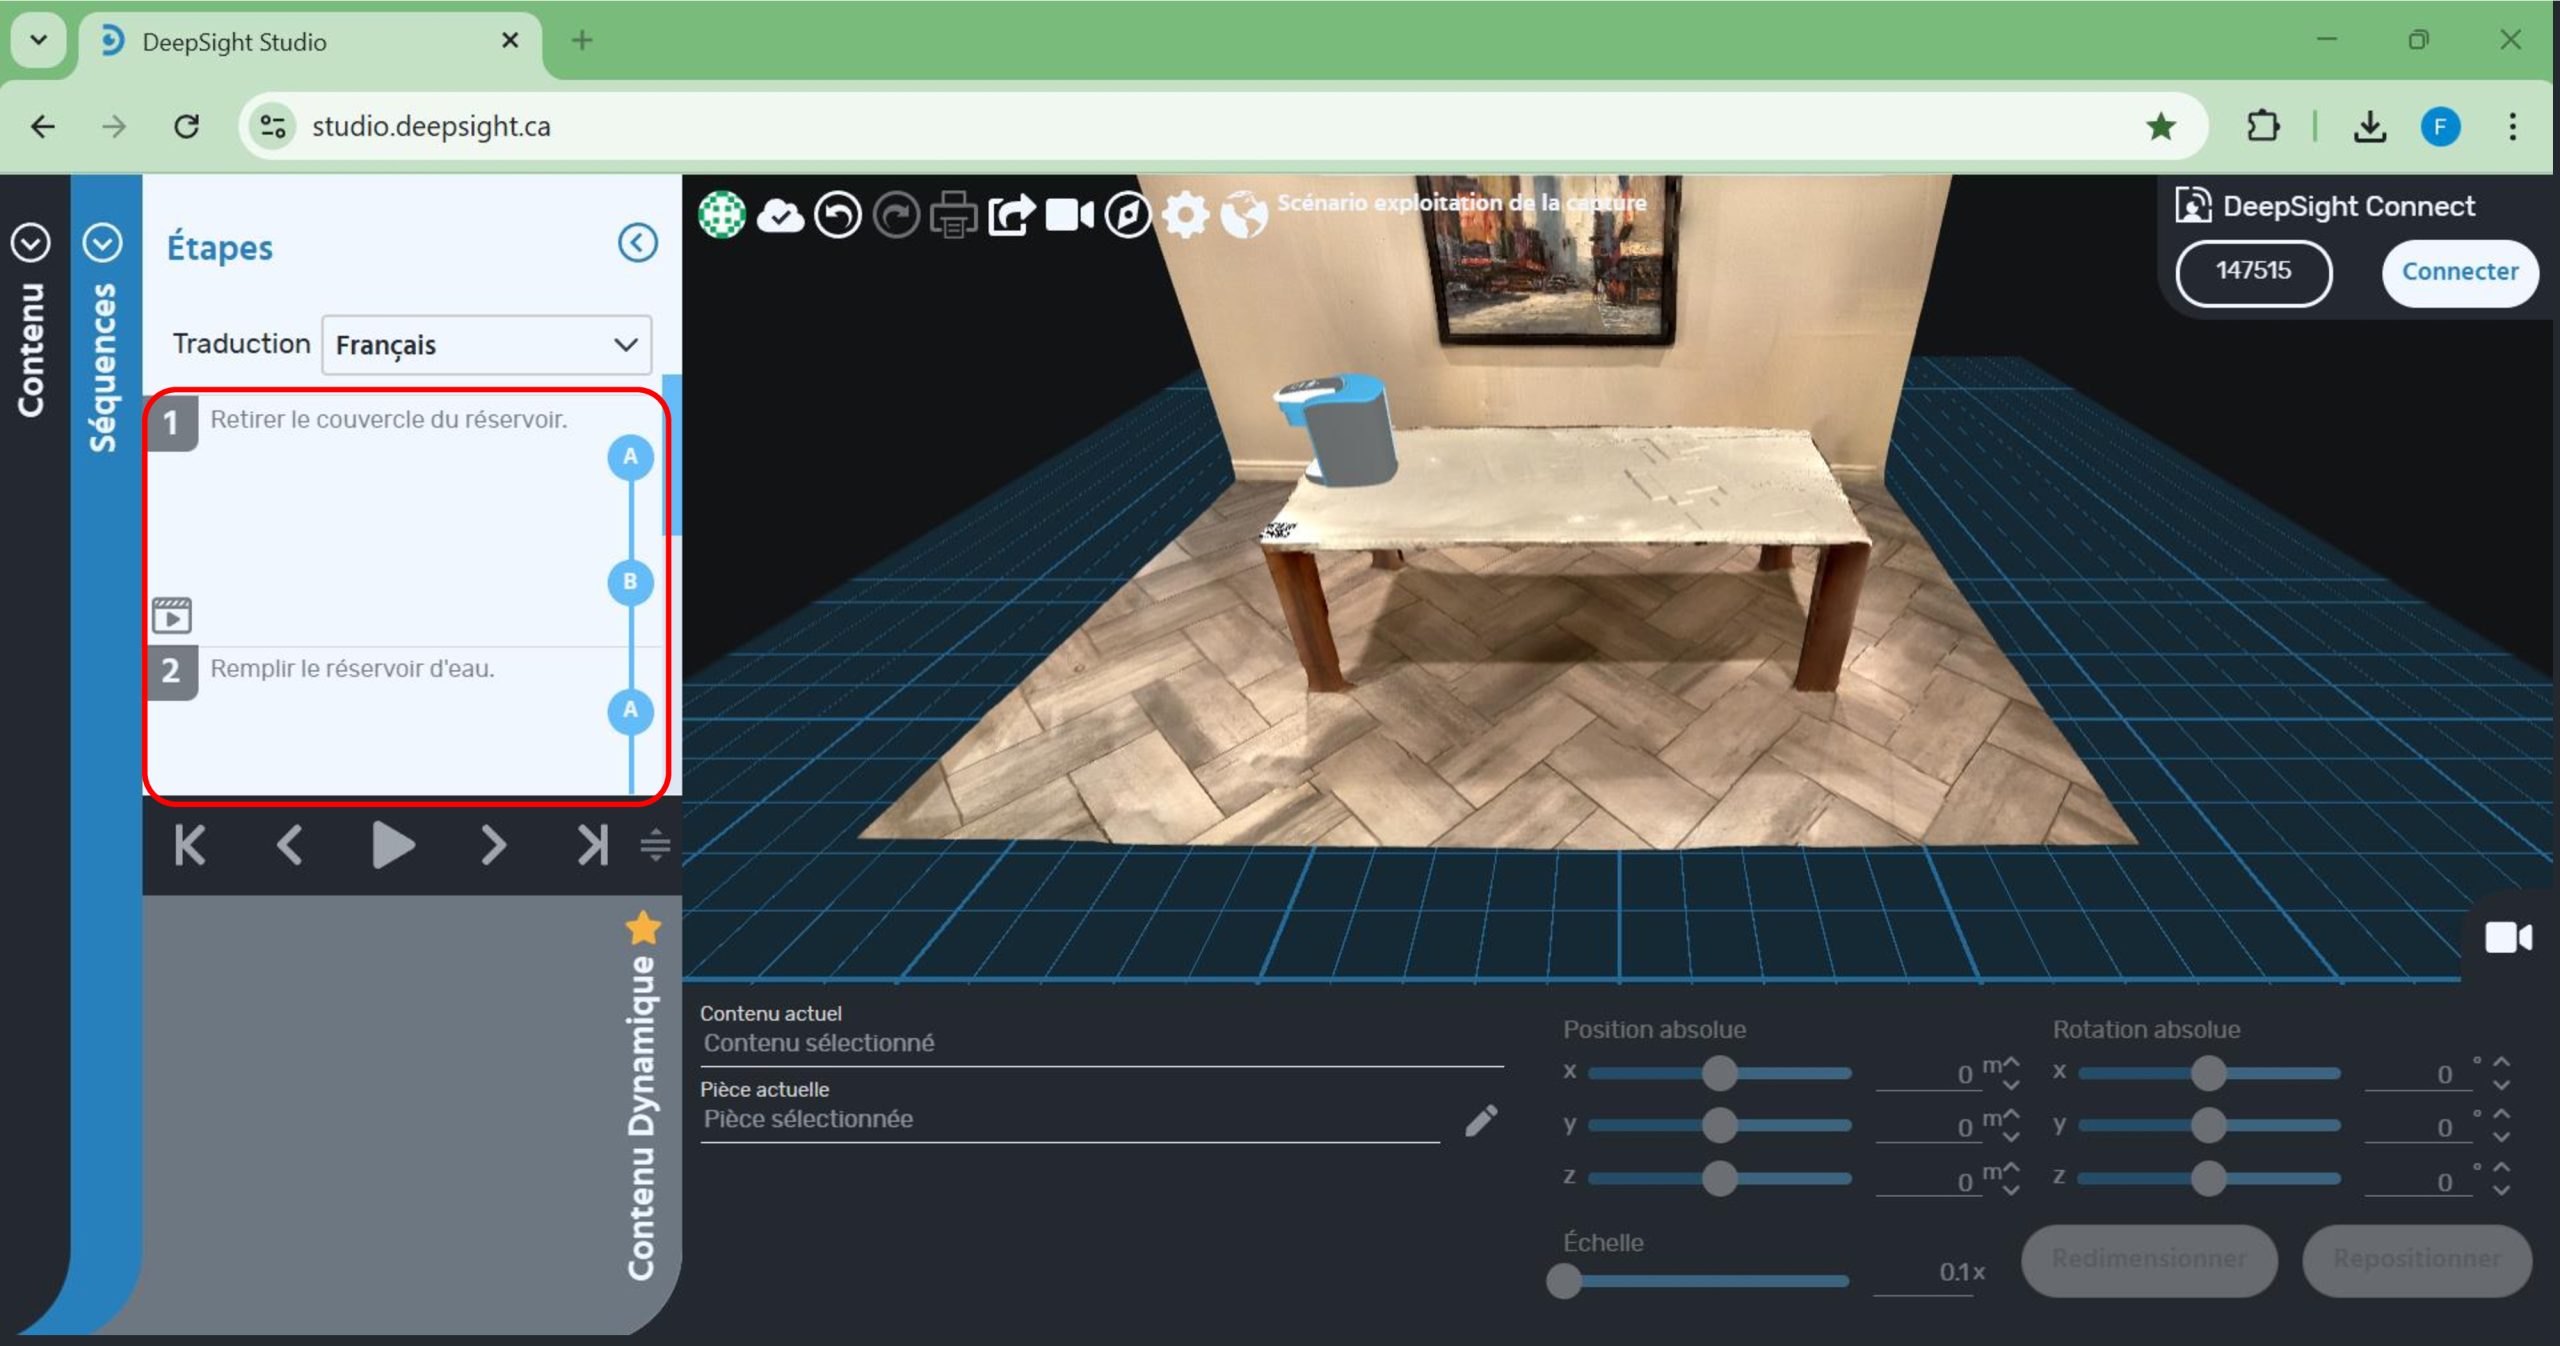
- Next, click on the ‘Generate Steps’ button.
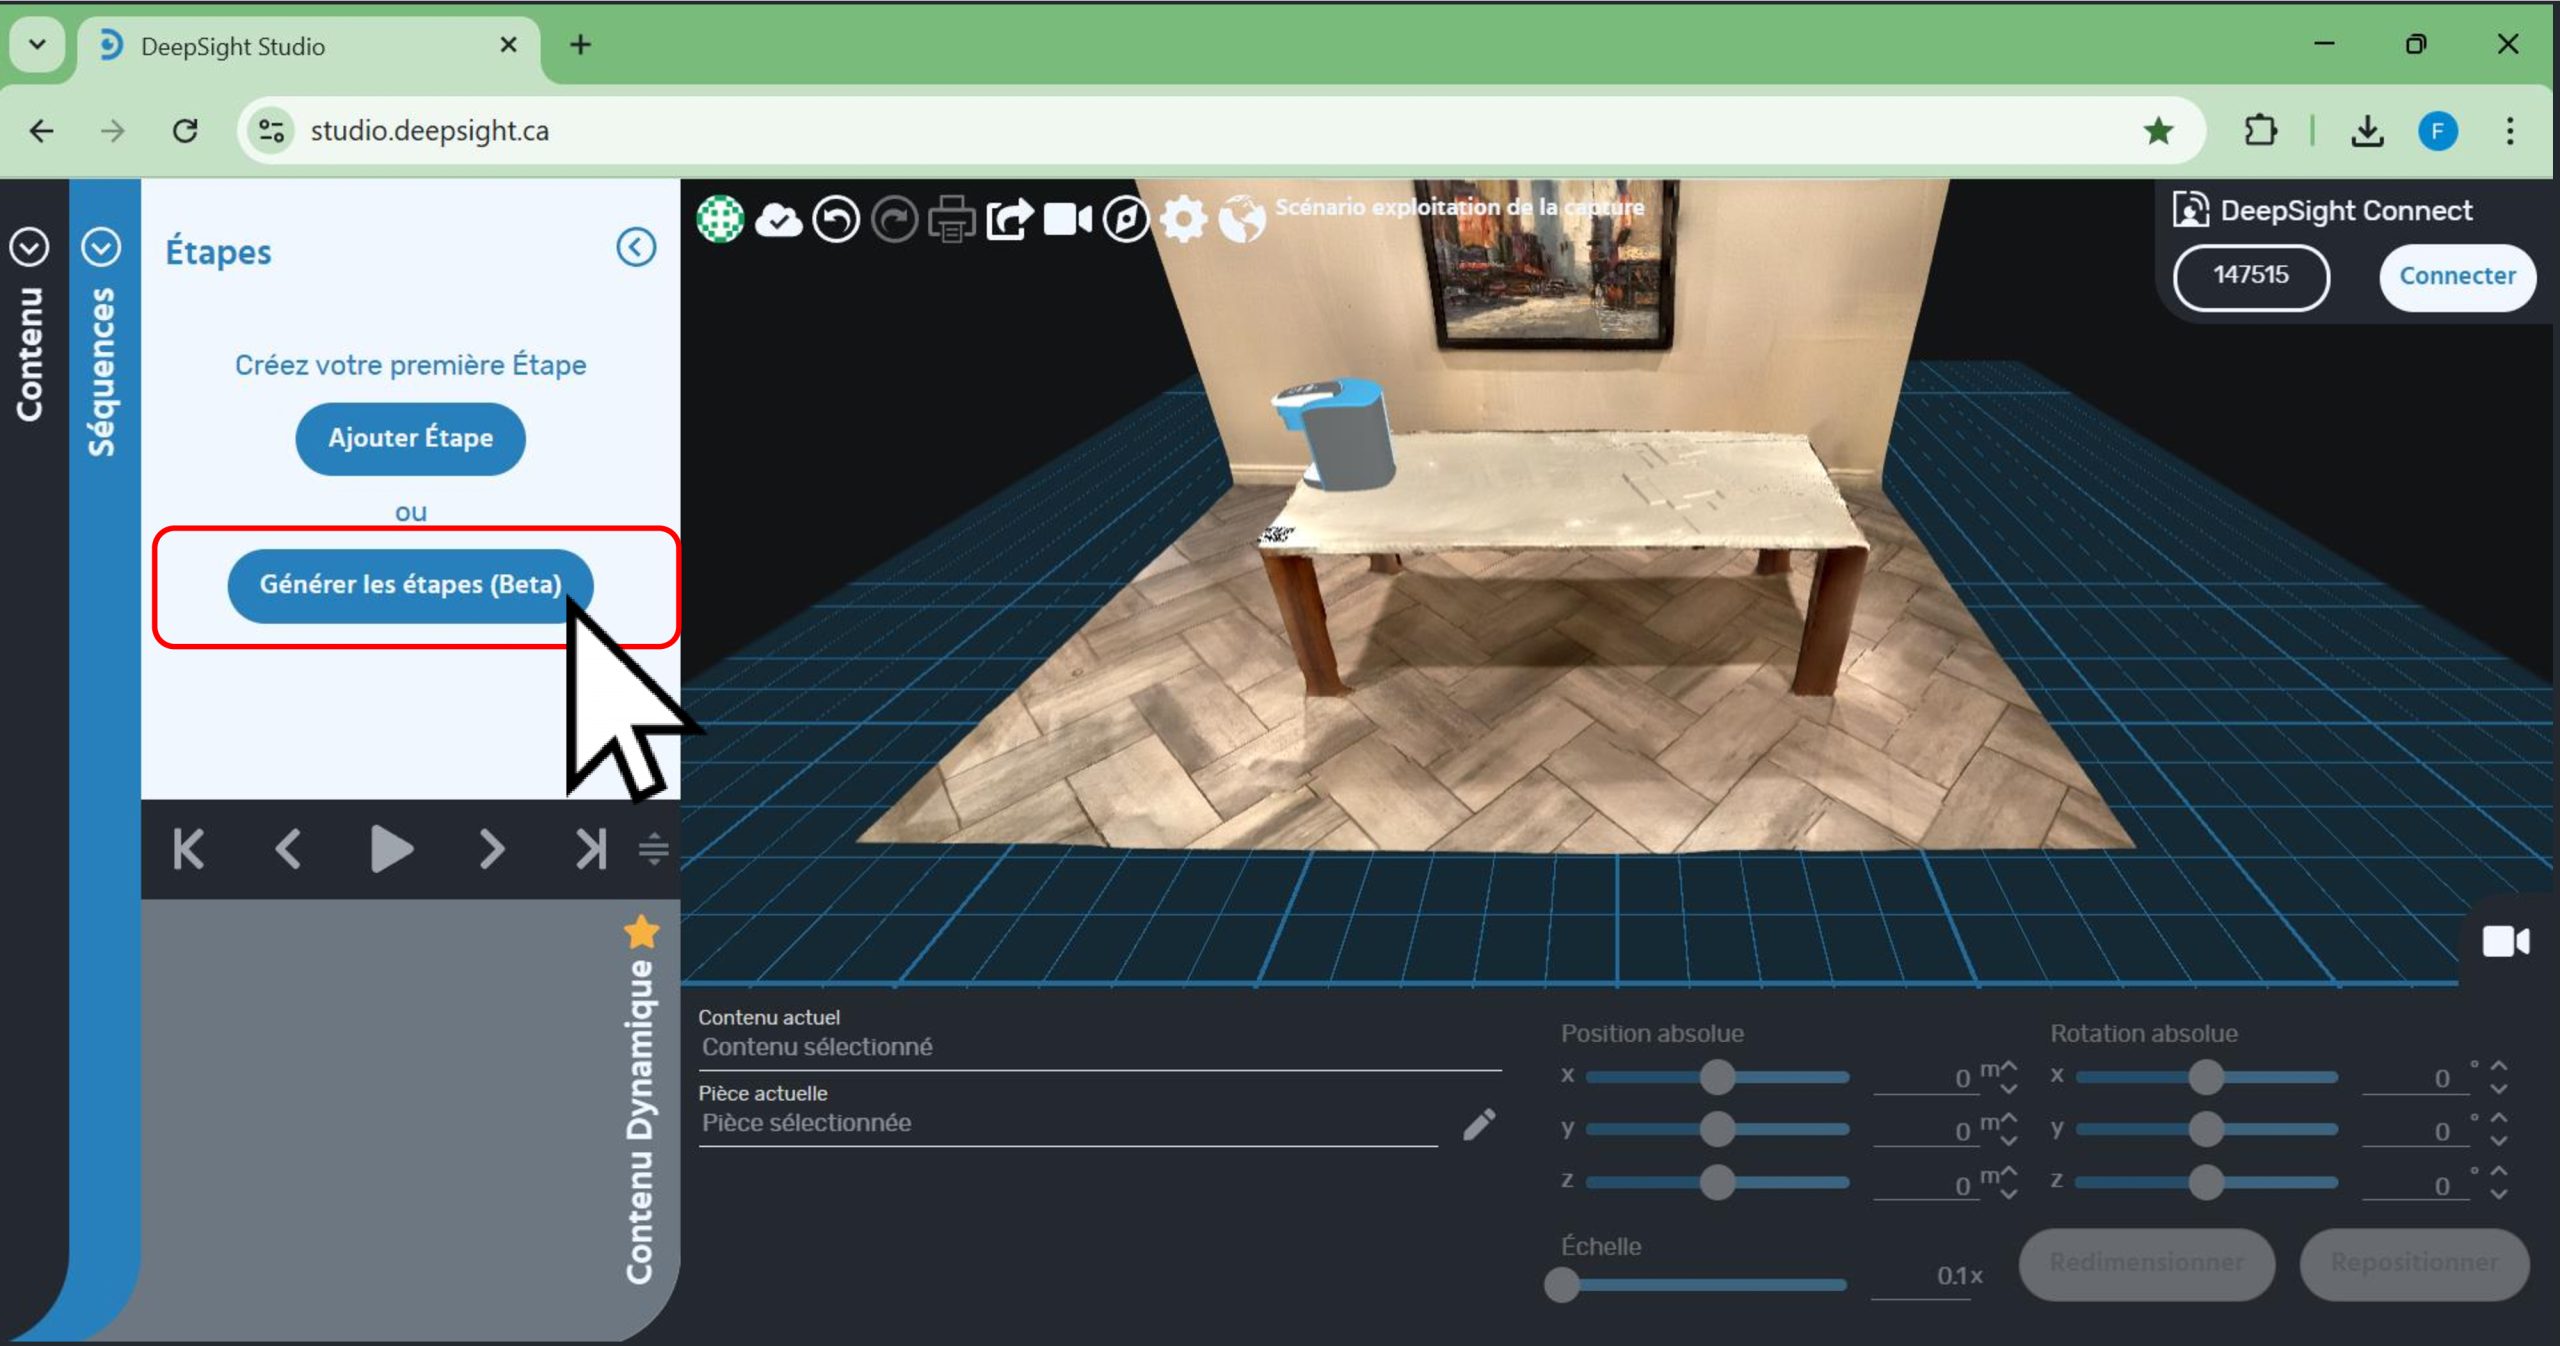
- After loading, you will see the steps generated by the artificial intelligence appear, located in the red box in the image.
- It is always important to review the generated steps to validate whether any modifications are needed.
- You will have the ability to modify the description of the steps, reorder them, delete them, or add new ones.
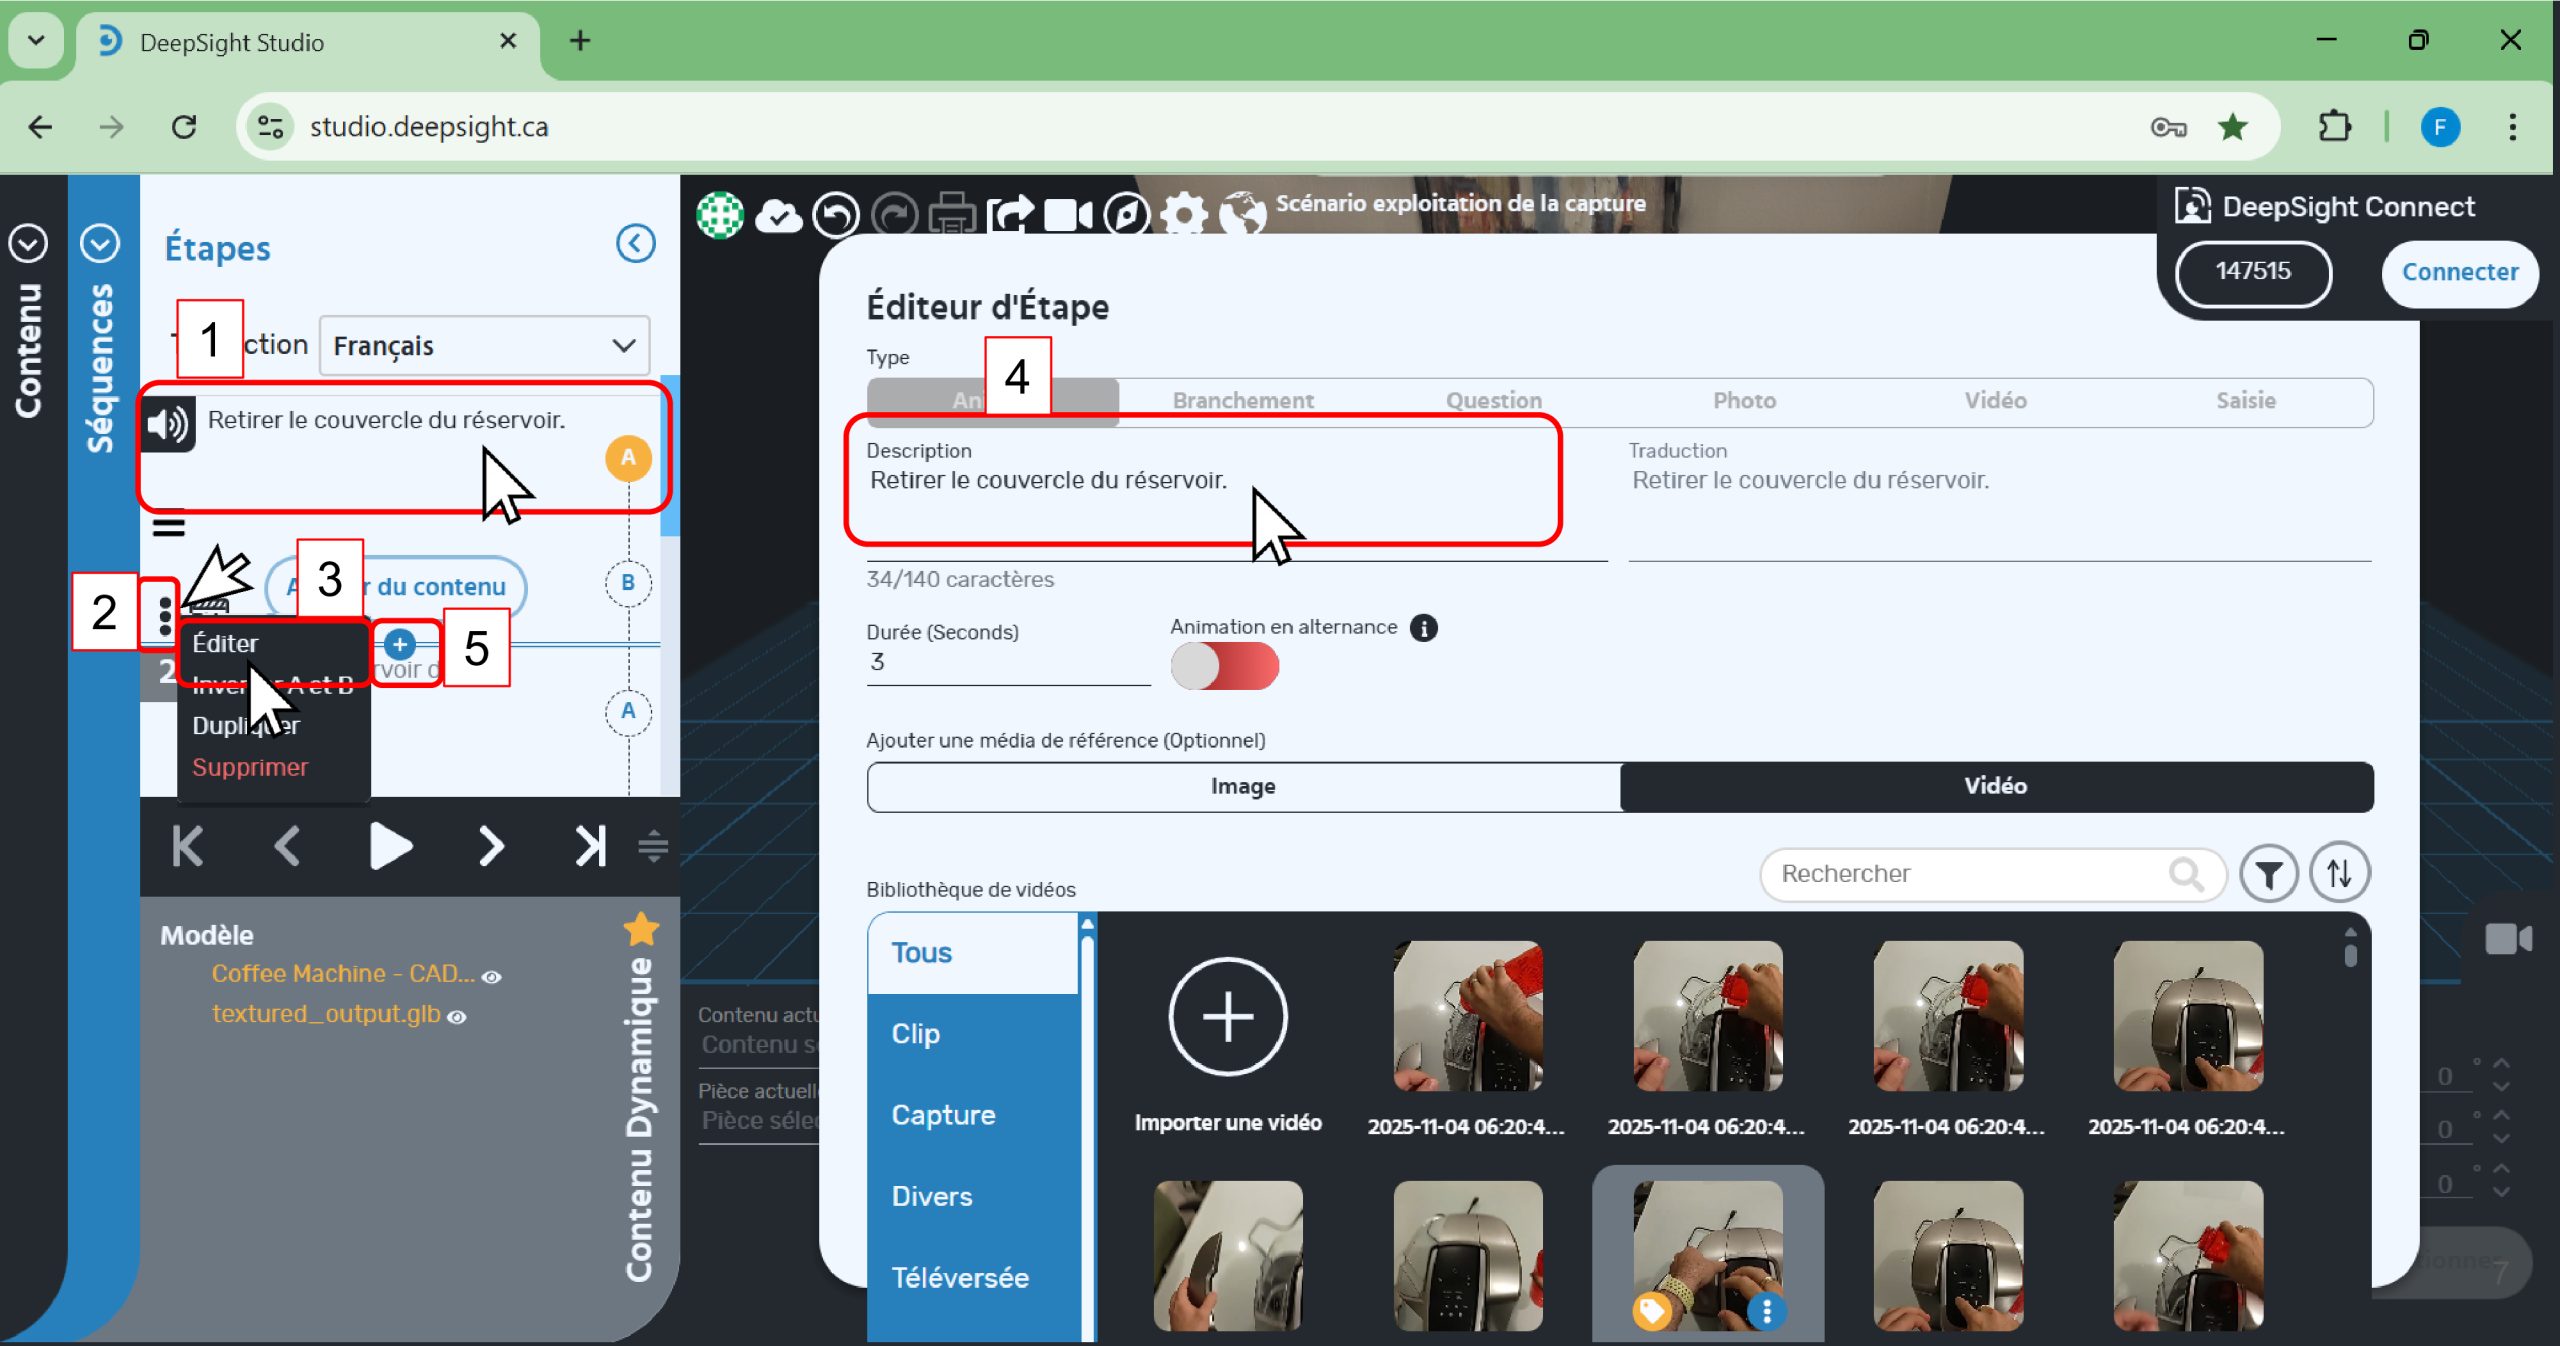
To edit the text of a step:
- 1. Click on the step whose text you want to modify.
- 2. Then click on the ‘three dots’ icon for that step.
- 3. Click on ‘Edit’.
- 4. A window will appear where you can modify the step’s text in the ‘Description’ section.
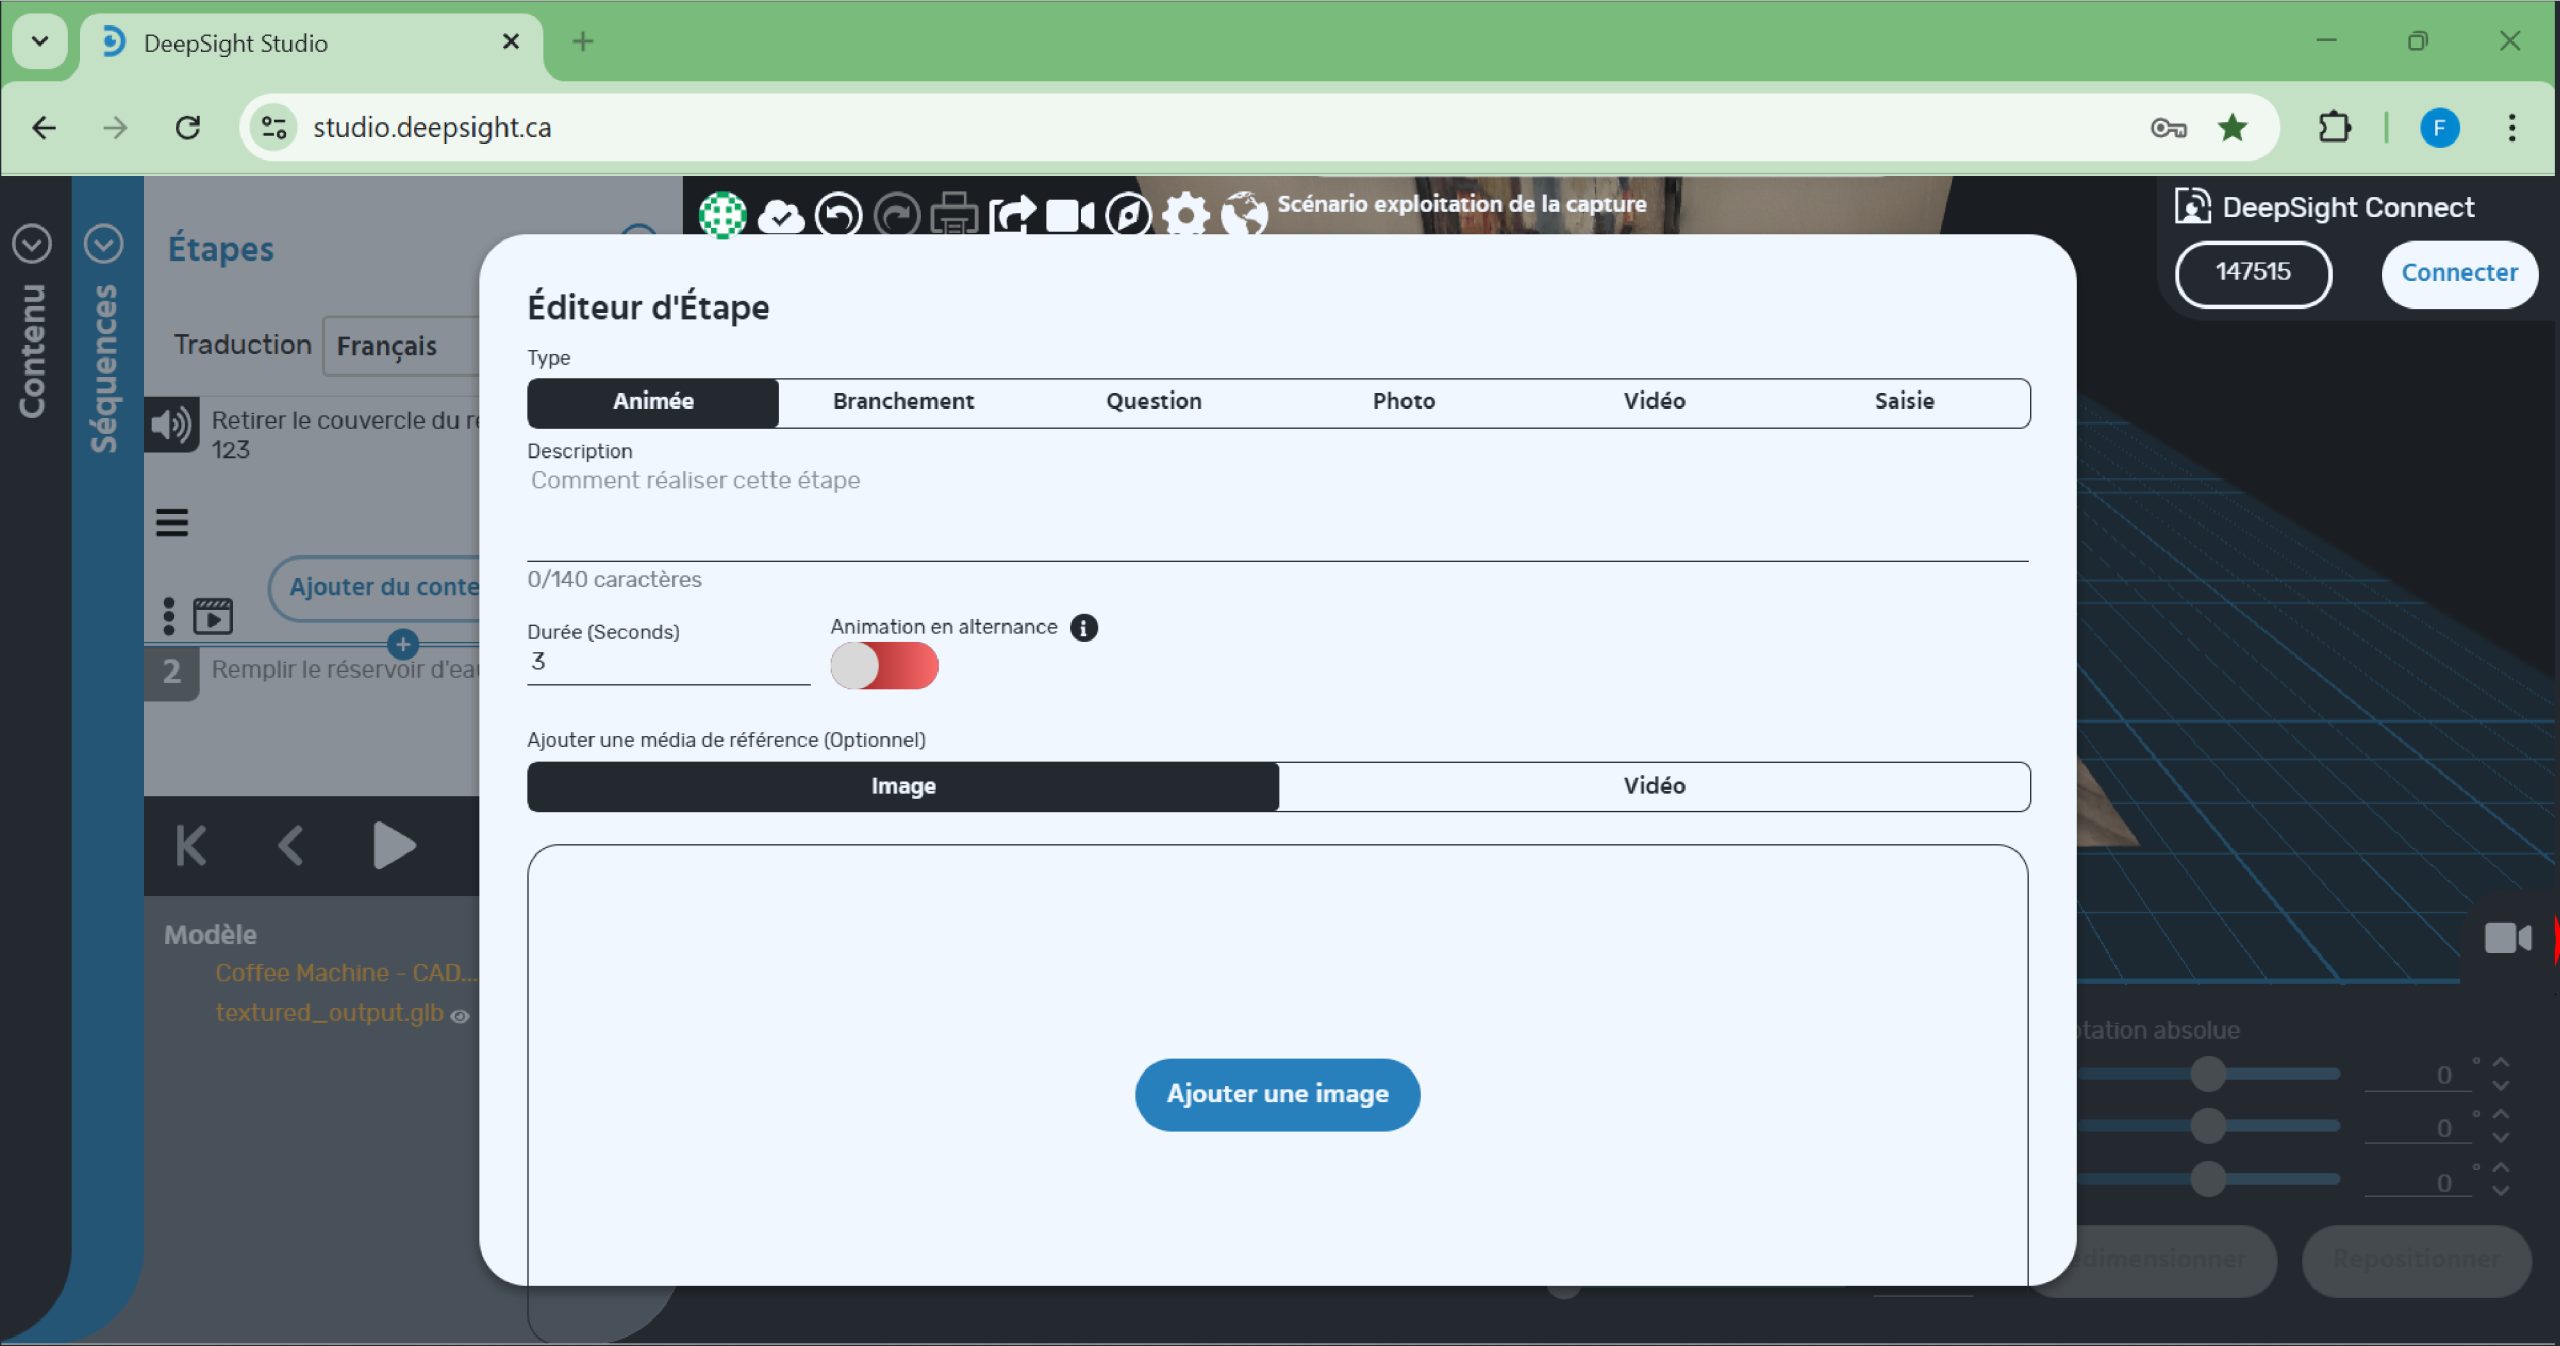
- 5. If an additional step is needed, click on the ‘+’ button
- A window will appear, allowing you to create a new step of type ‘Animated’, ‘Branching’, ‘Question’, ‘Photo’, ‘Video’, or ‘Input’.
- Refer to the ‘Training Scenario – DS Studio’ guide for guidance on these different types of steps.
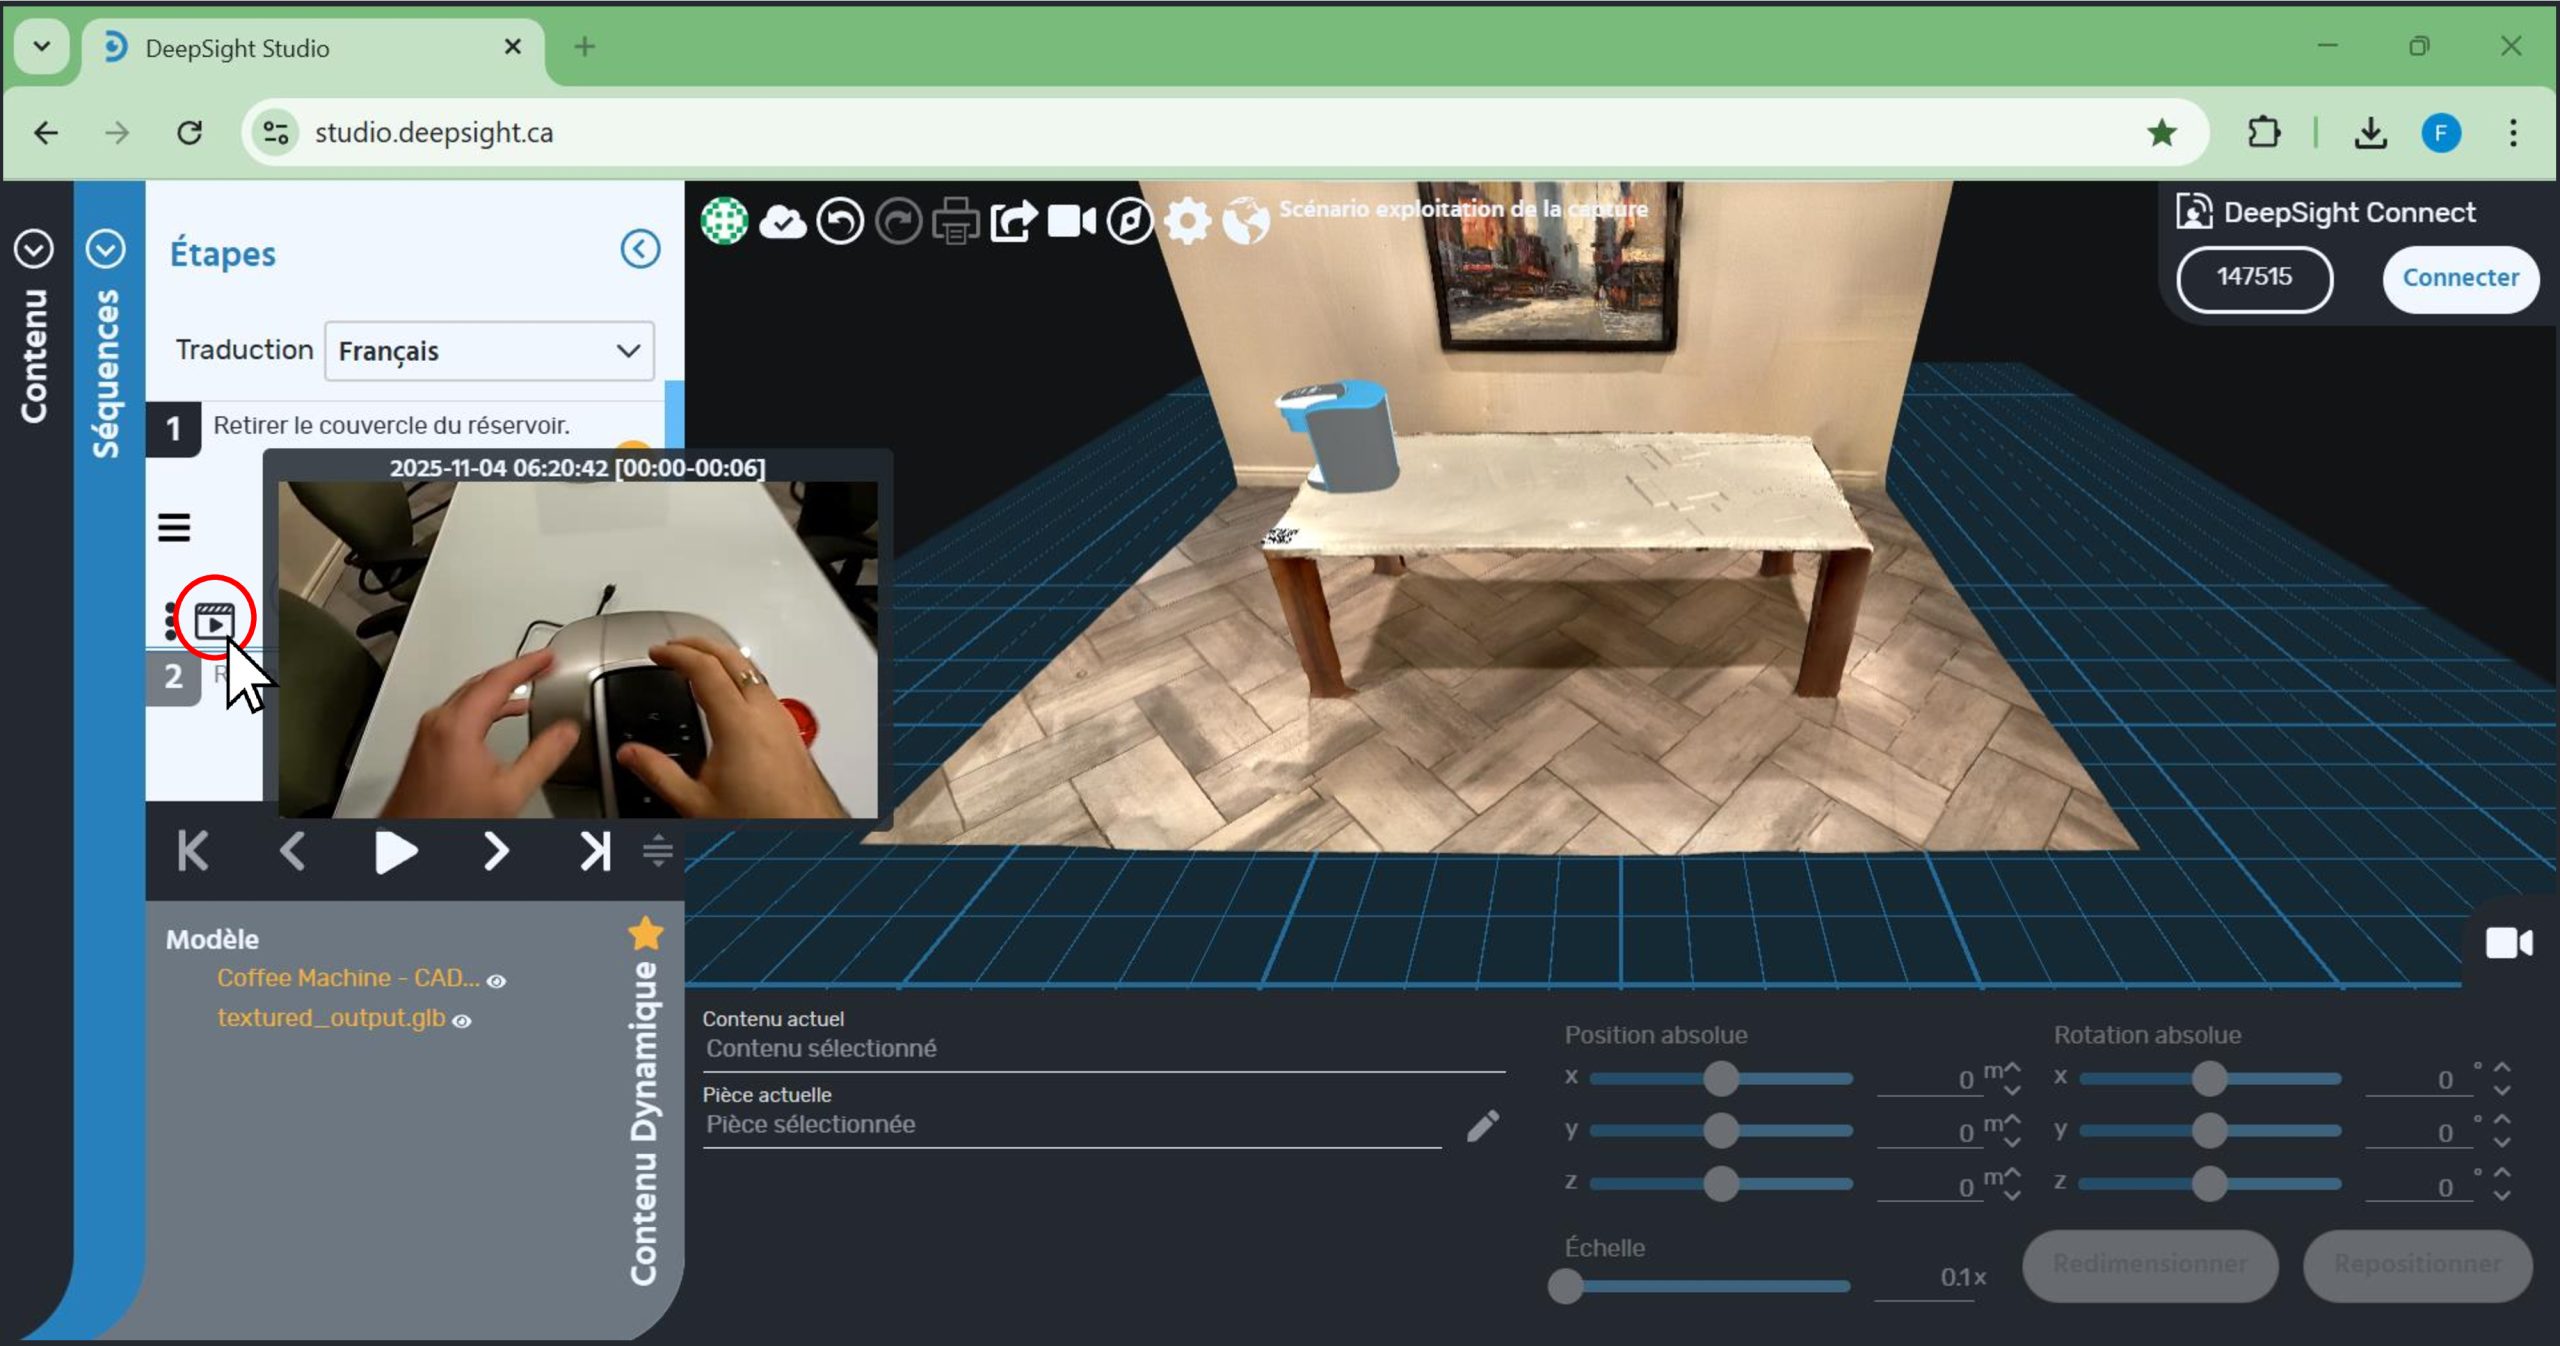
The artificial intelligence will have assigned a video segment to each step, taken from the capture’s video stream. You can preview a segment by:
- Clicking on the step whose video segment you want to view.
- Then hovering your cursor over the ‘video’ icon.
- You will also be able to edit this video segment to better match what is described in the step, if desired. The following steps will explain how to edit the capture’s video stream to create new segments that can be assigned to a step.
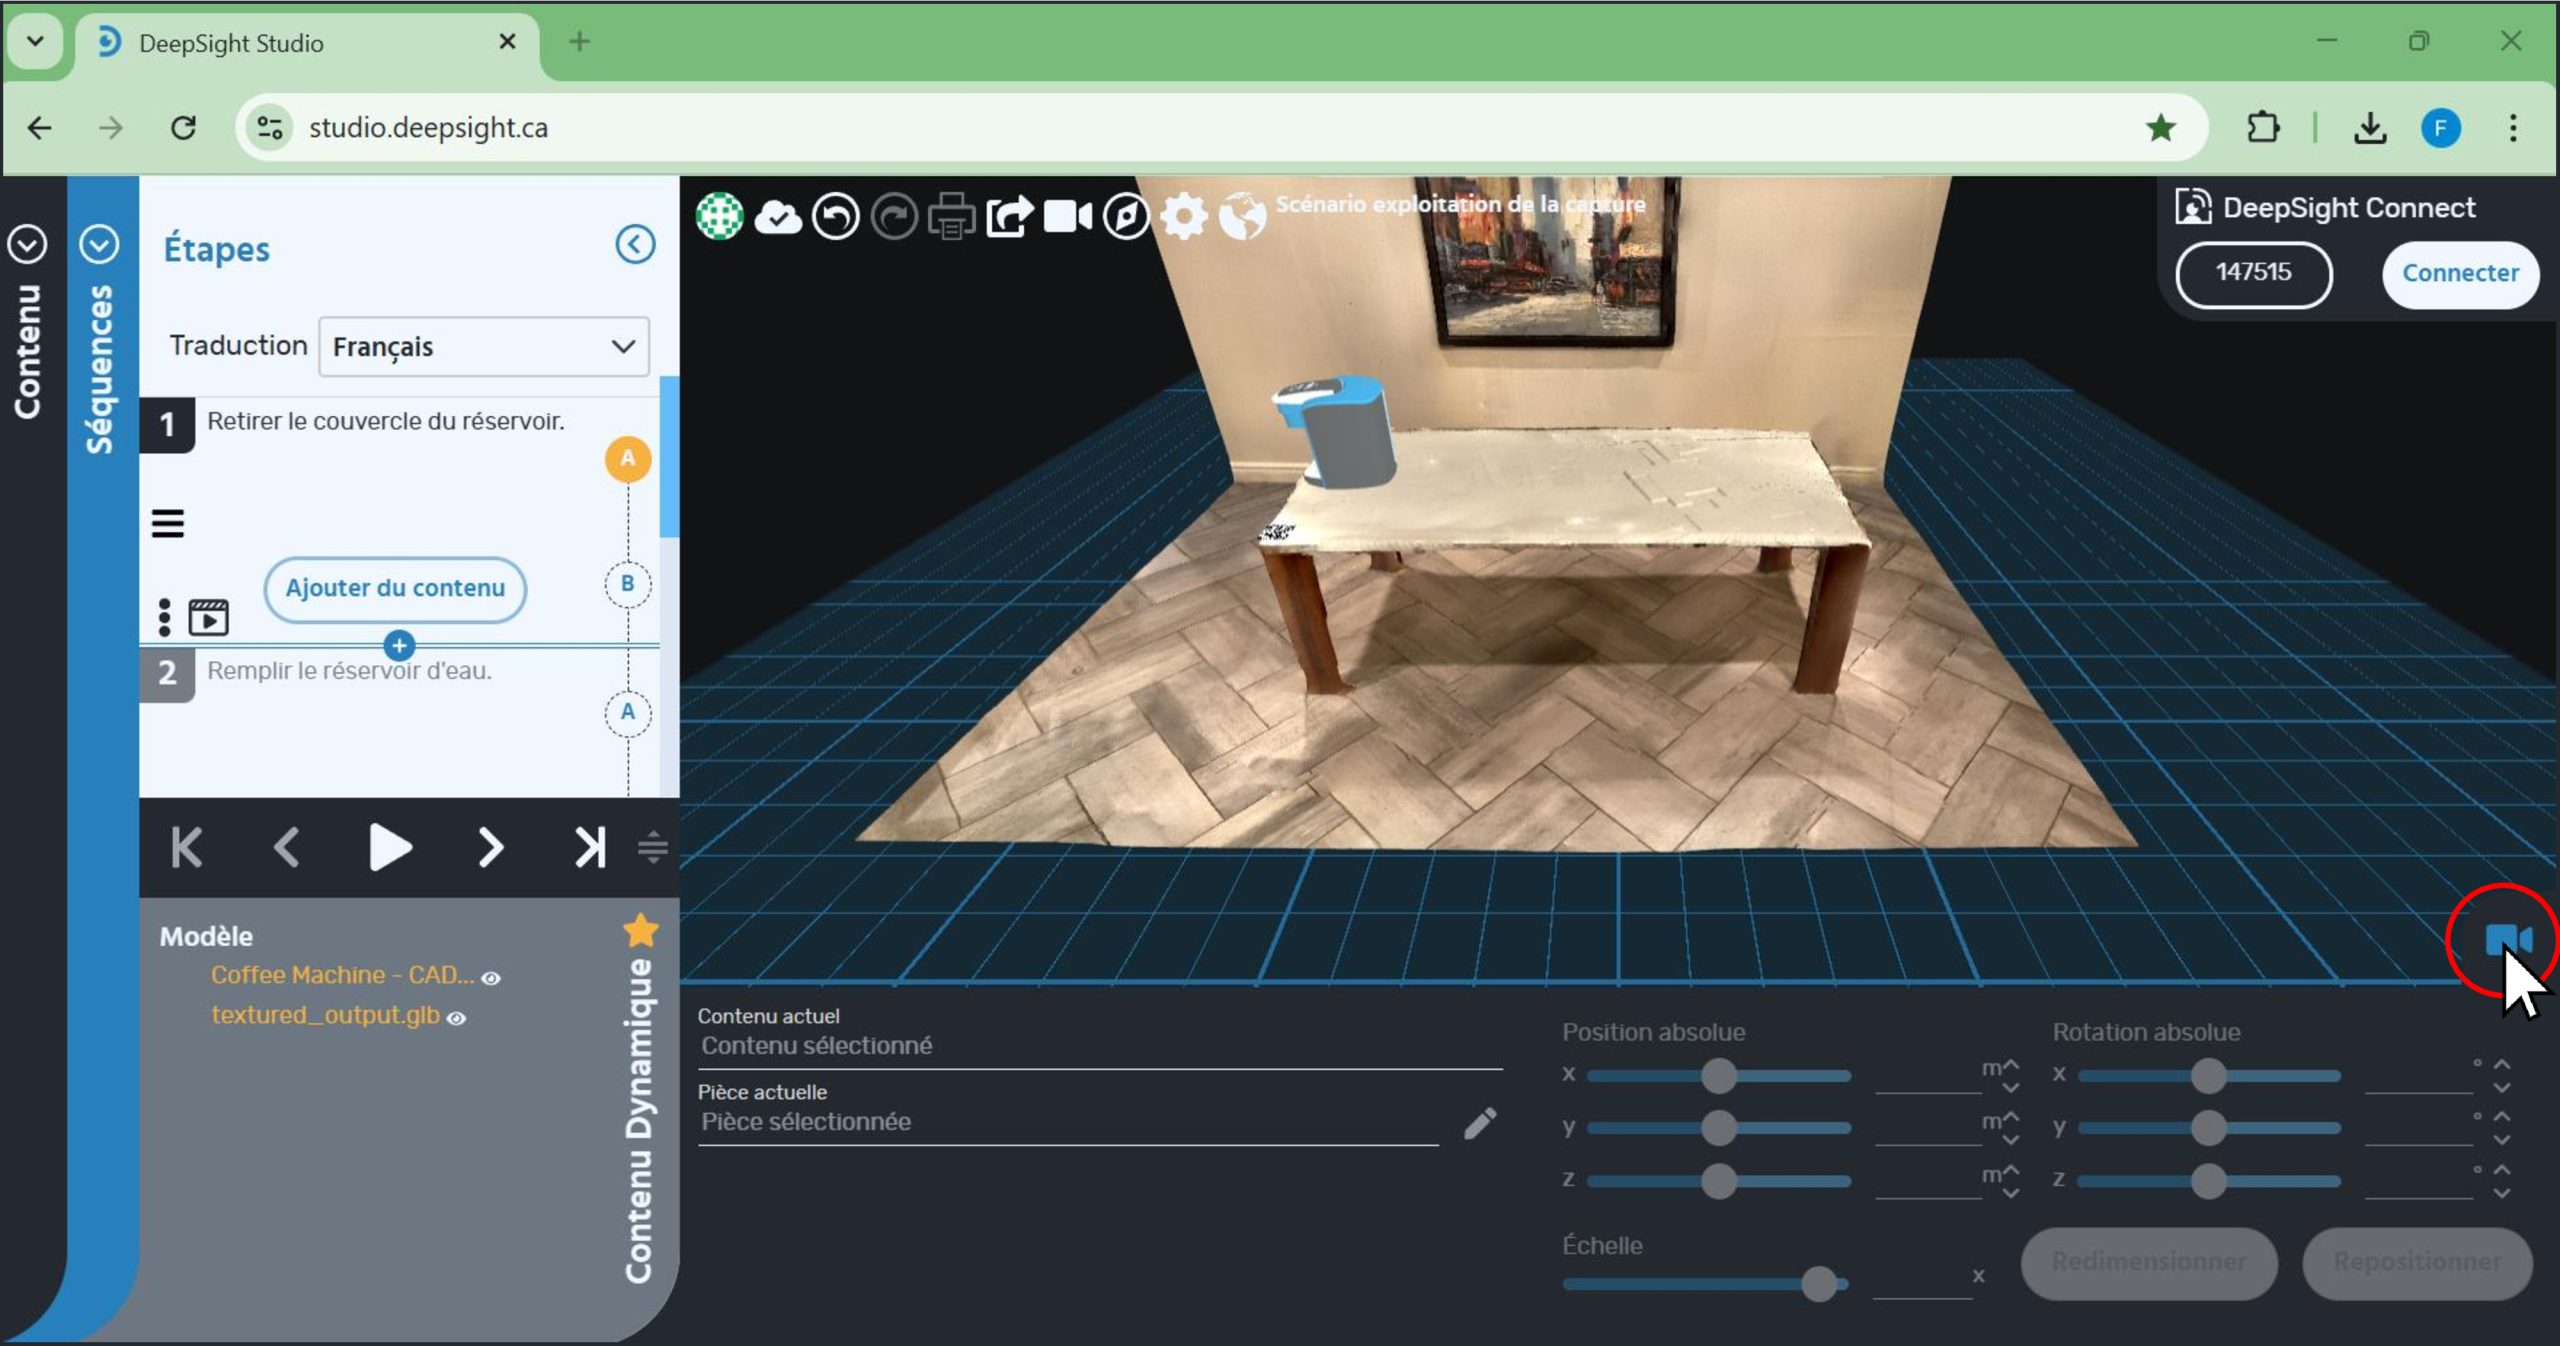
- Click on the camera icon.
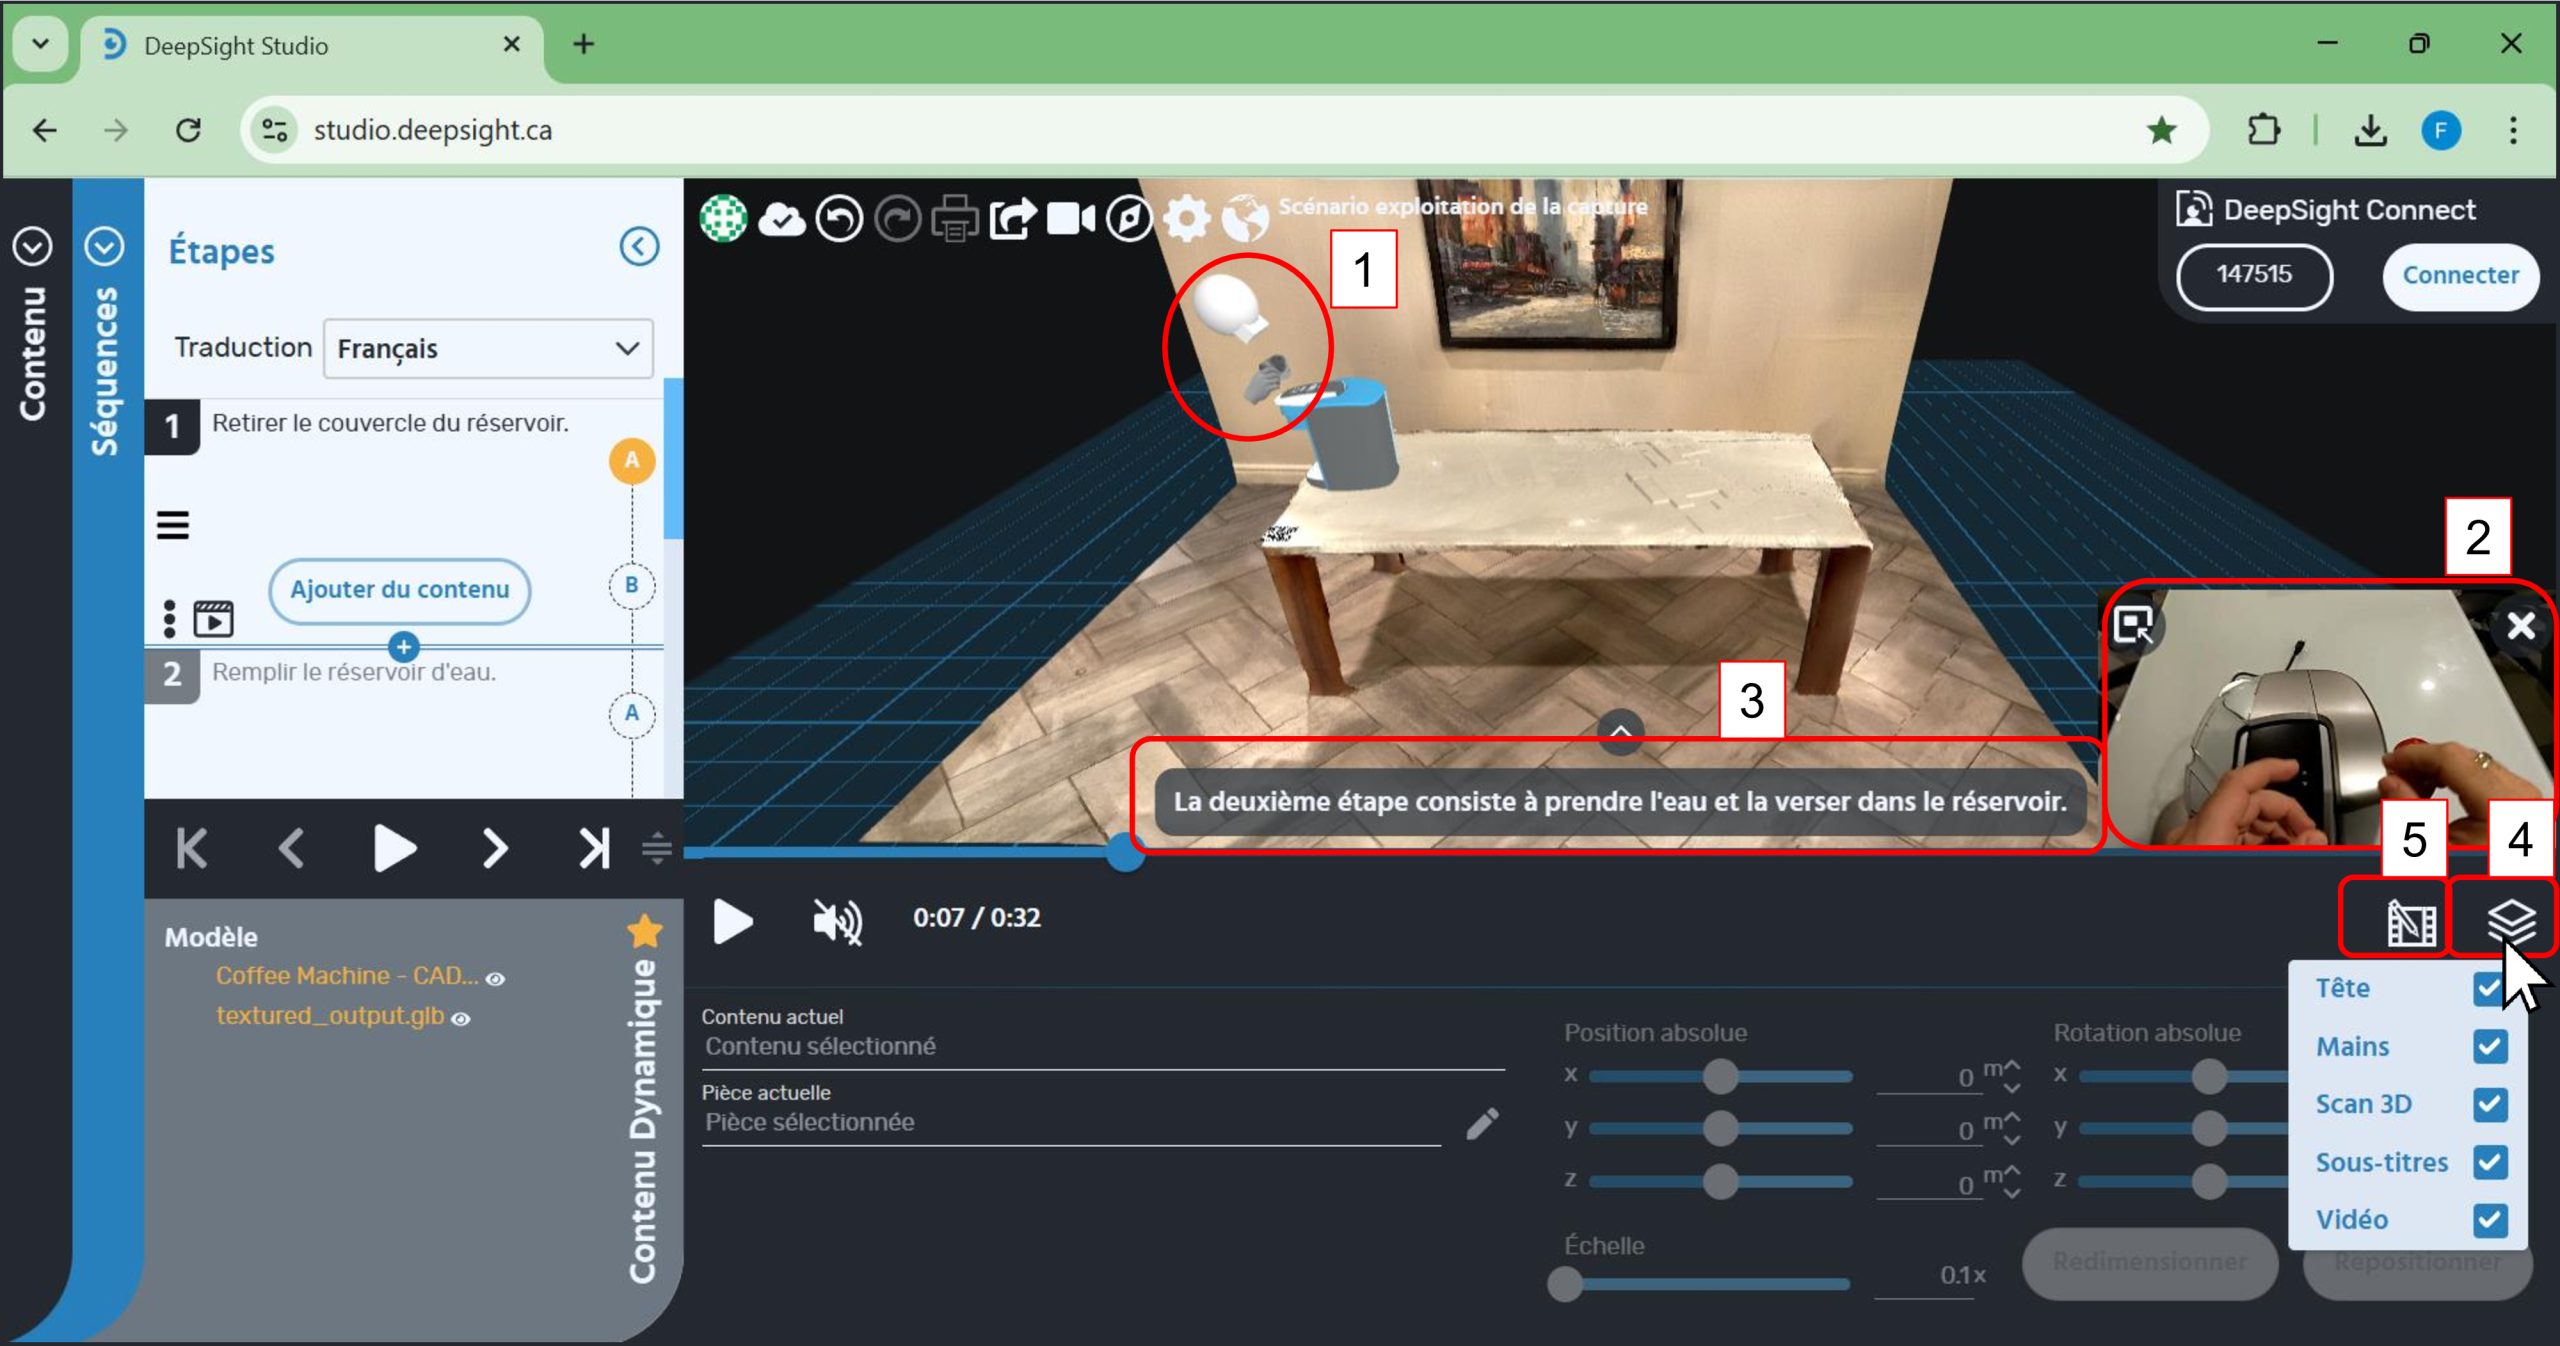
You will enter the capture’s information environment. You will notice:
- 1. The presence of the expert’s head and hands*
- 2. The capture’s video stream and the associated timeline
- 3. Subtitles of what the expert says during the capture
- 4. A filter button allowing you to show or hide the elements mentioned above. To access the filters, simply click on this button.
- 5. A button to edit the video segments assigned to steps
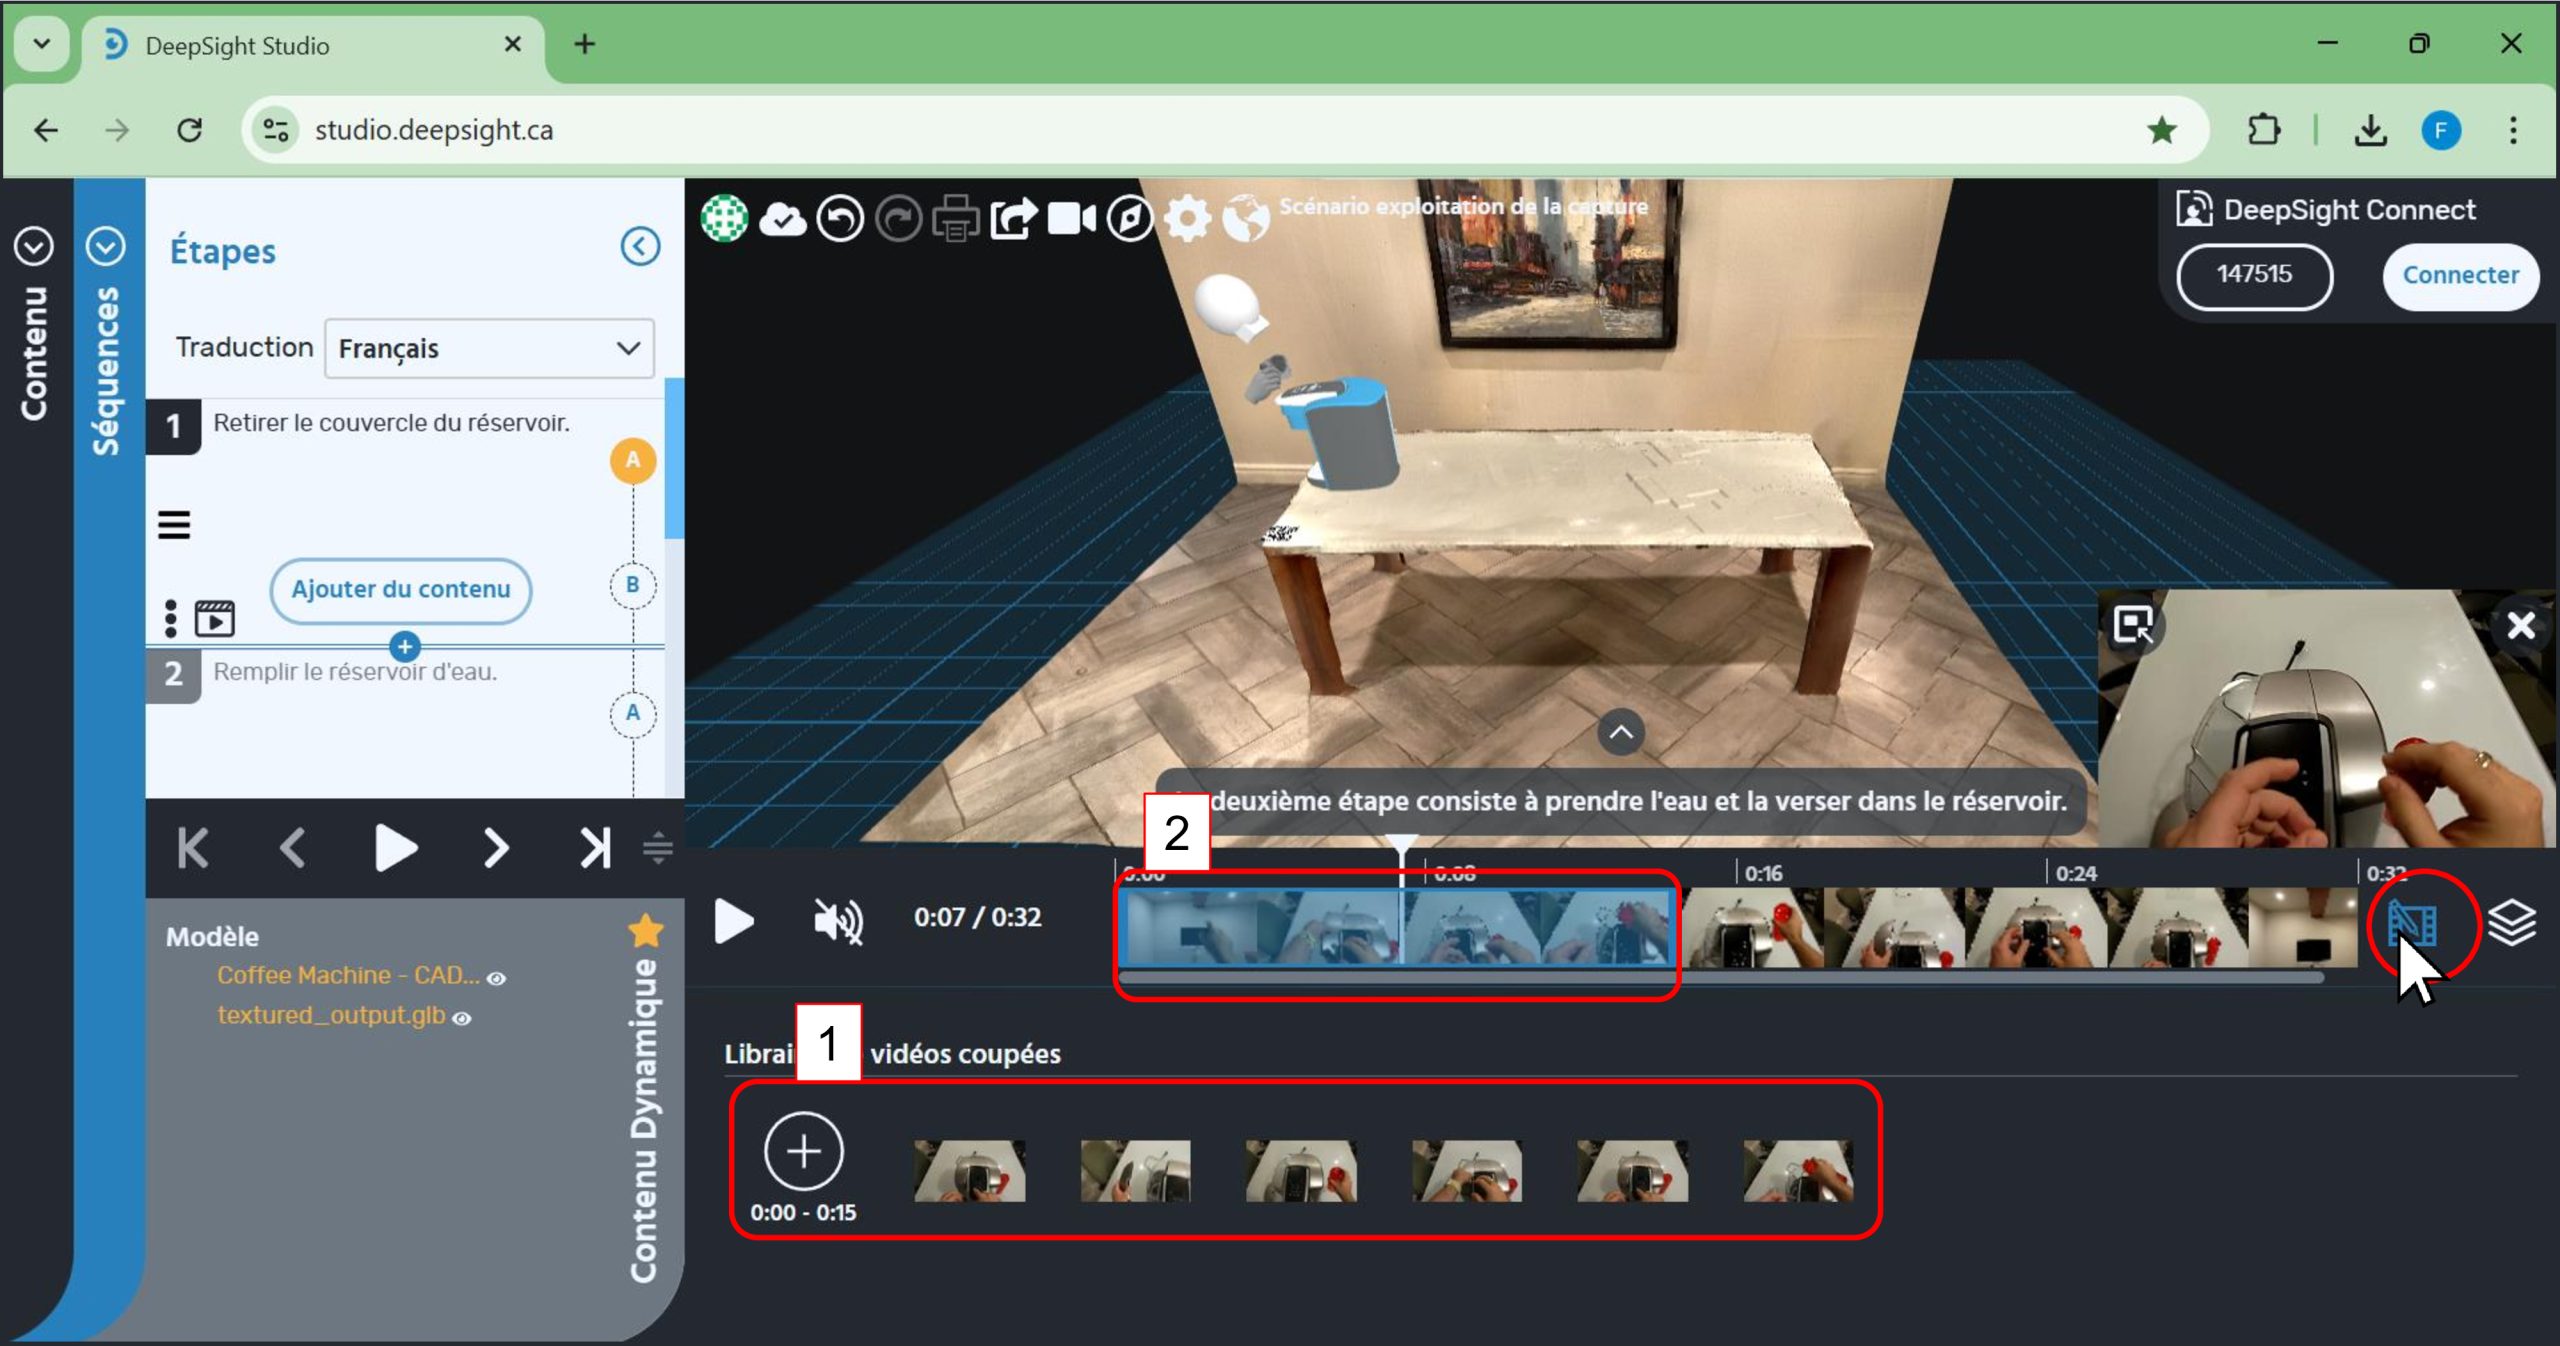
You will now see how to edit a video segment assigned to a step. After clicking on the video edit icon, you will see the following elements:
- 1. All video segments taken from the capture’s video stream.
- 2. A video segment generation box.
- You can adjust the width of the generation box by dragging its left or right end to correspond to the start and end times of the video segment you want to generate.
- To drag the ends of the box, move your cursor over one of the ends, then click and hold.
- By moving your mouse from left to right while holding the button, you will notice that the width of the box changes.
- The next step of this scenario will show you how to assign a video segment to a step in your sequence.
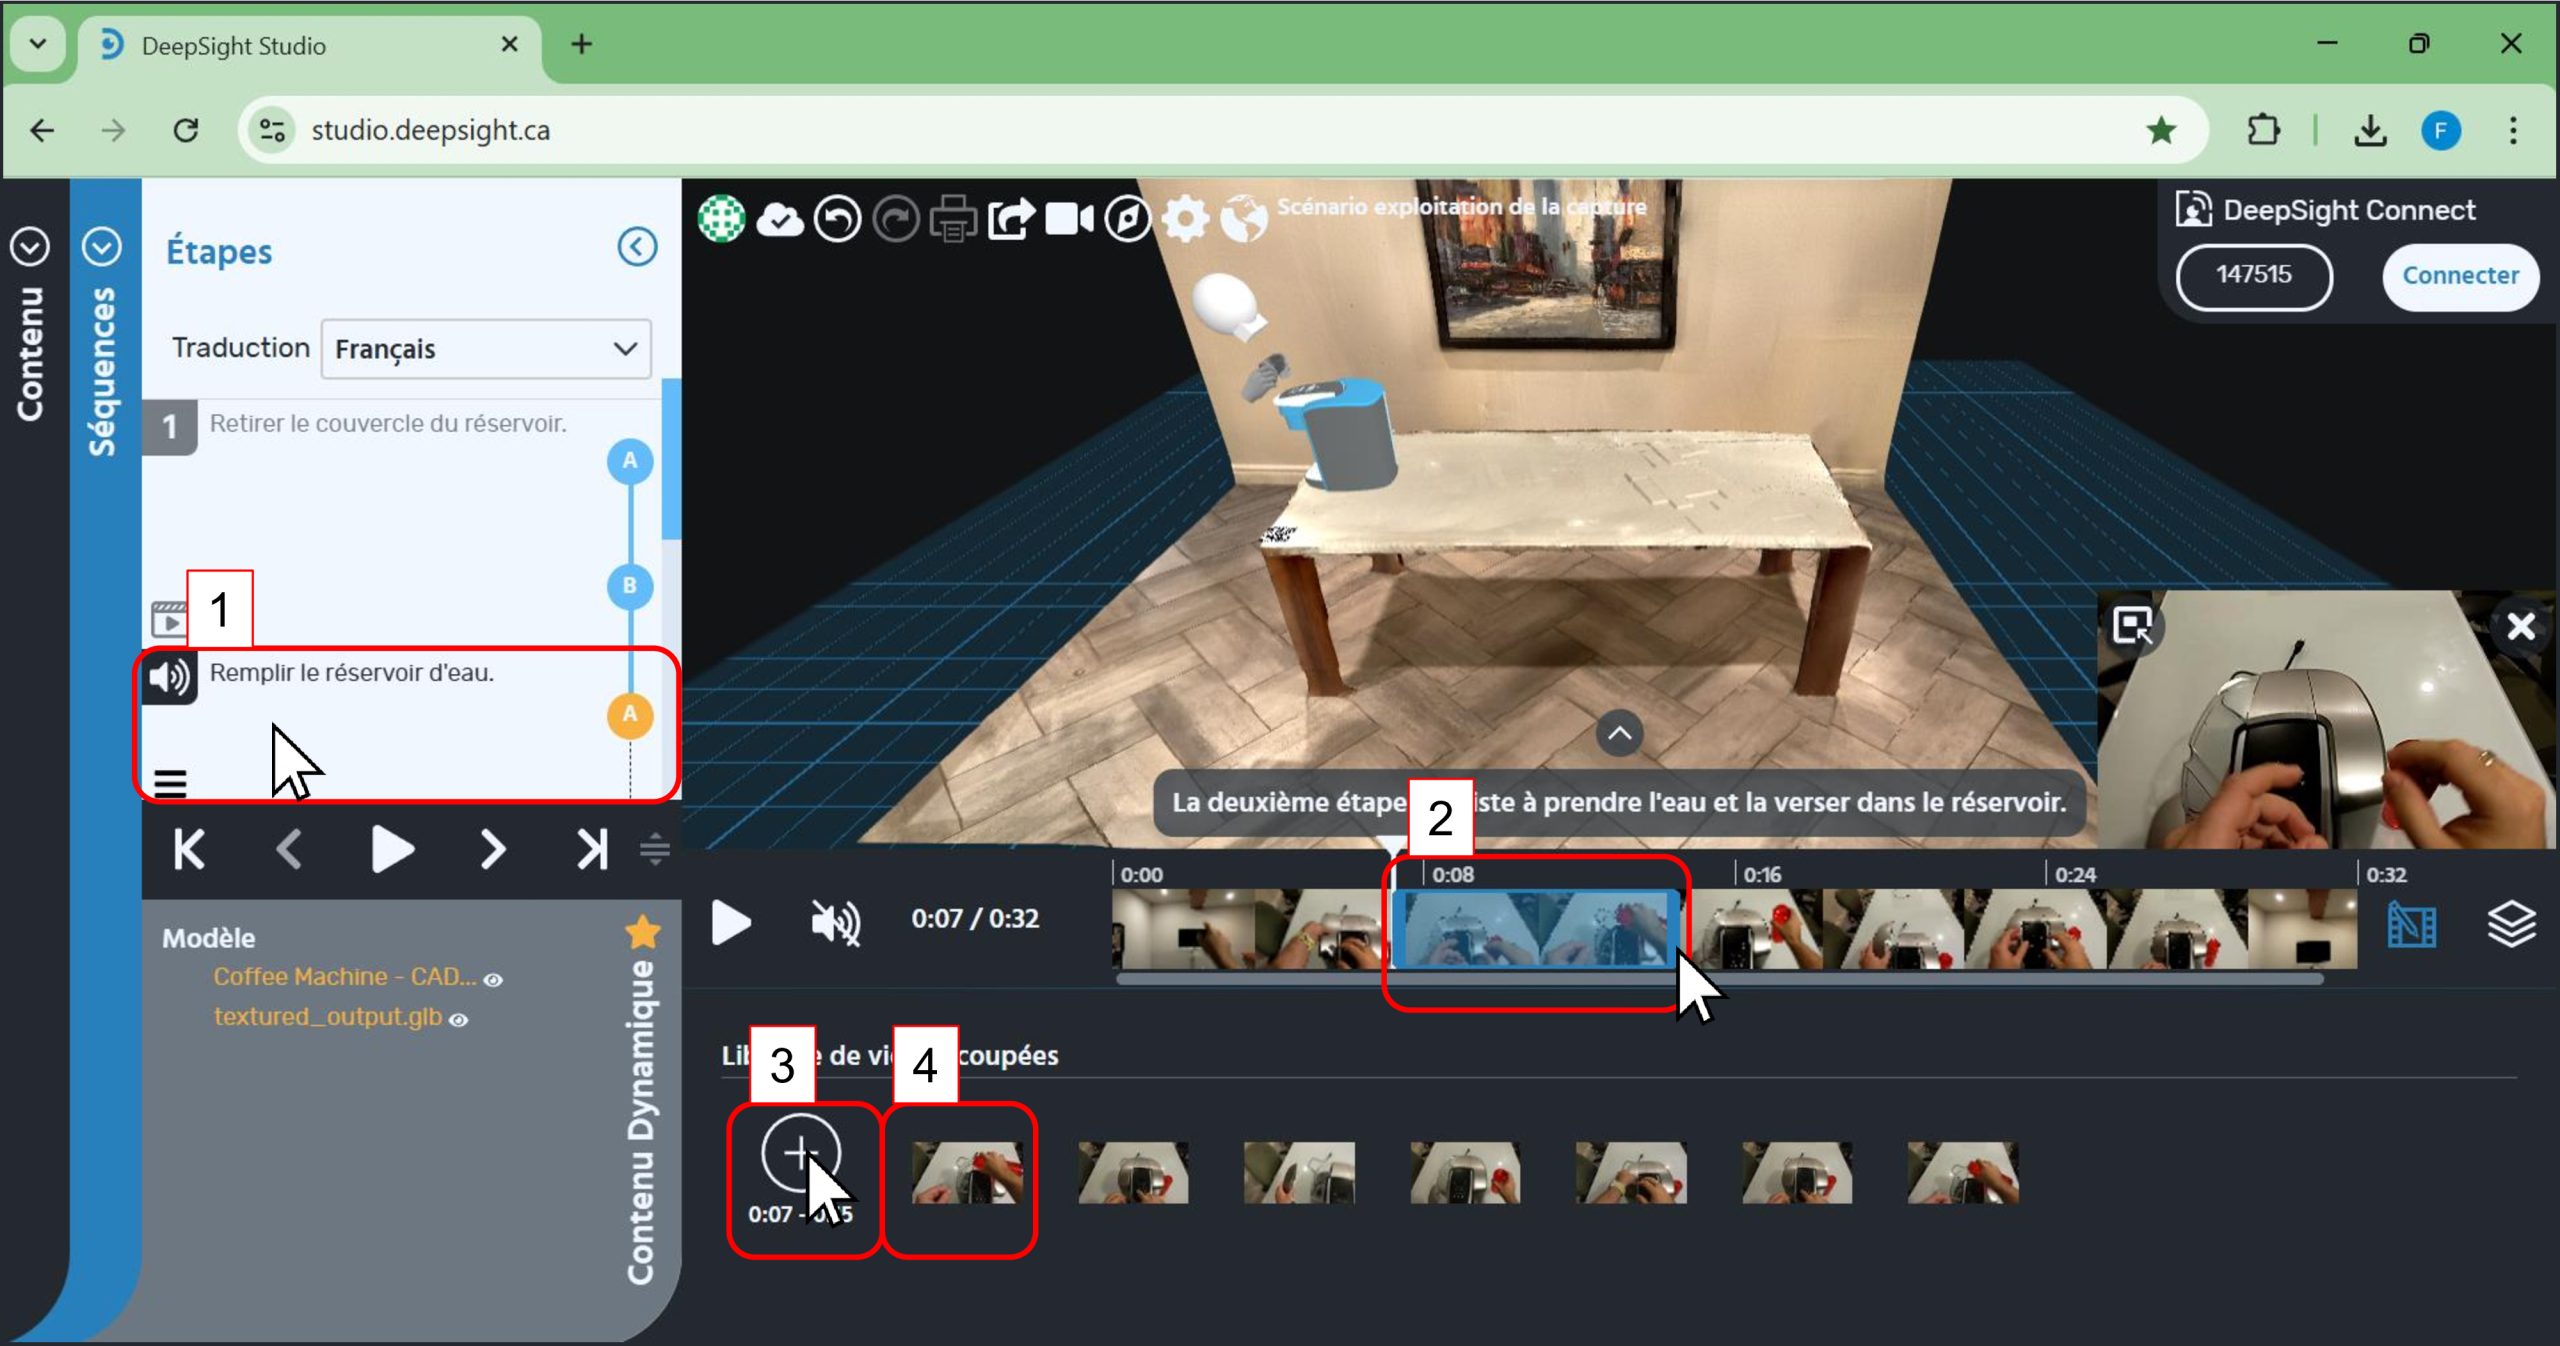
- 1. Click on the step to which you want to attach a new video segment.
- 2. Adjust the width and position of the video segment generation box to match the start and end times of the video stream corresponding to when the step is performed by the expert during the capture.
- 3. Click on the ‘+’ button to generate the segment.
- 4. You will see an additional segment appear next to the existing segments.
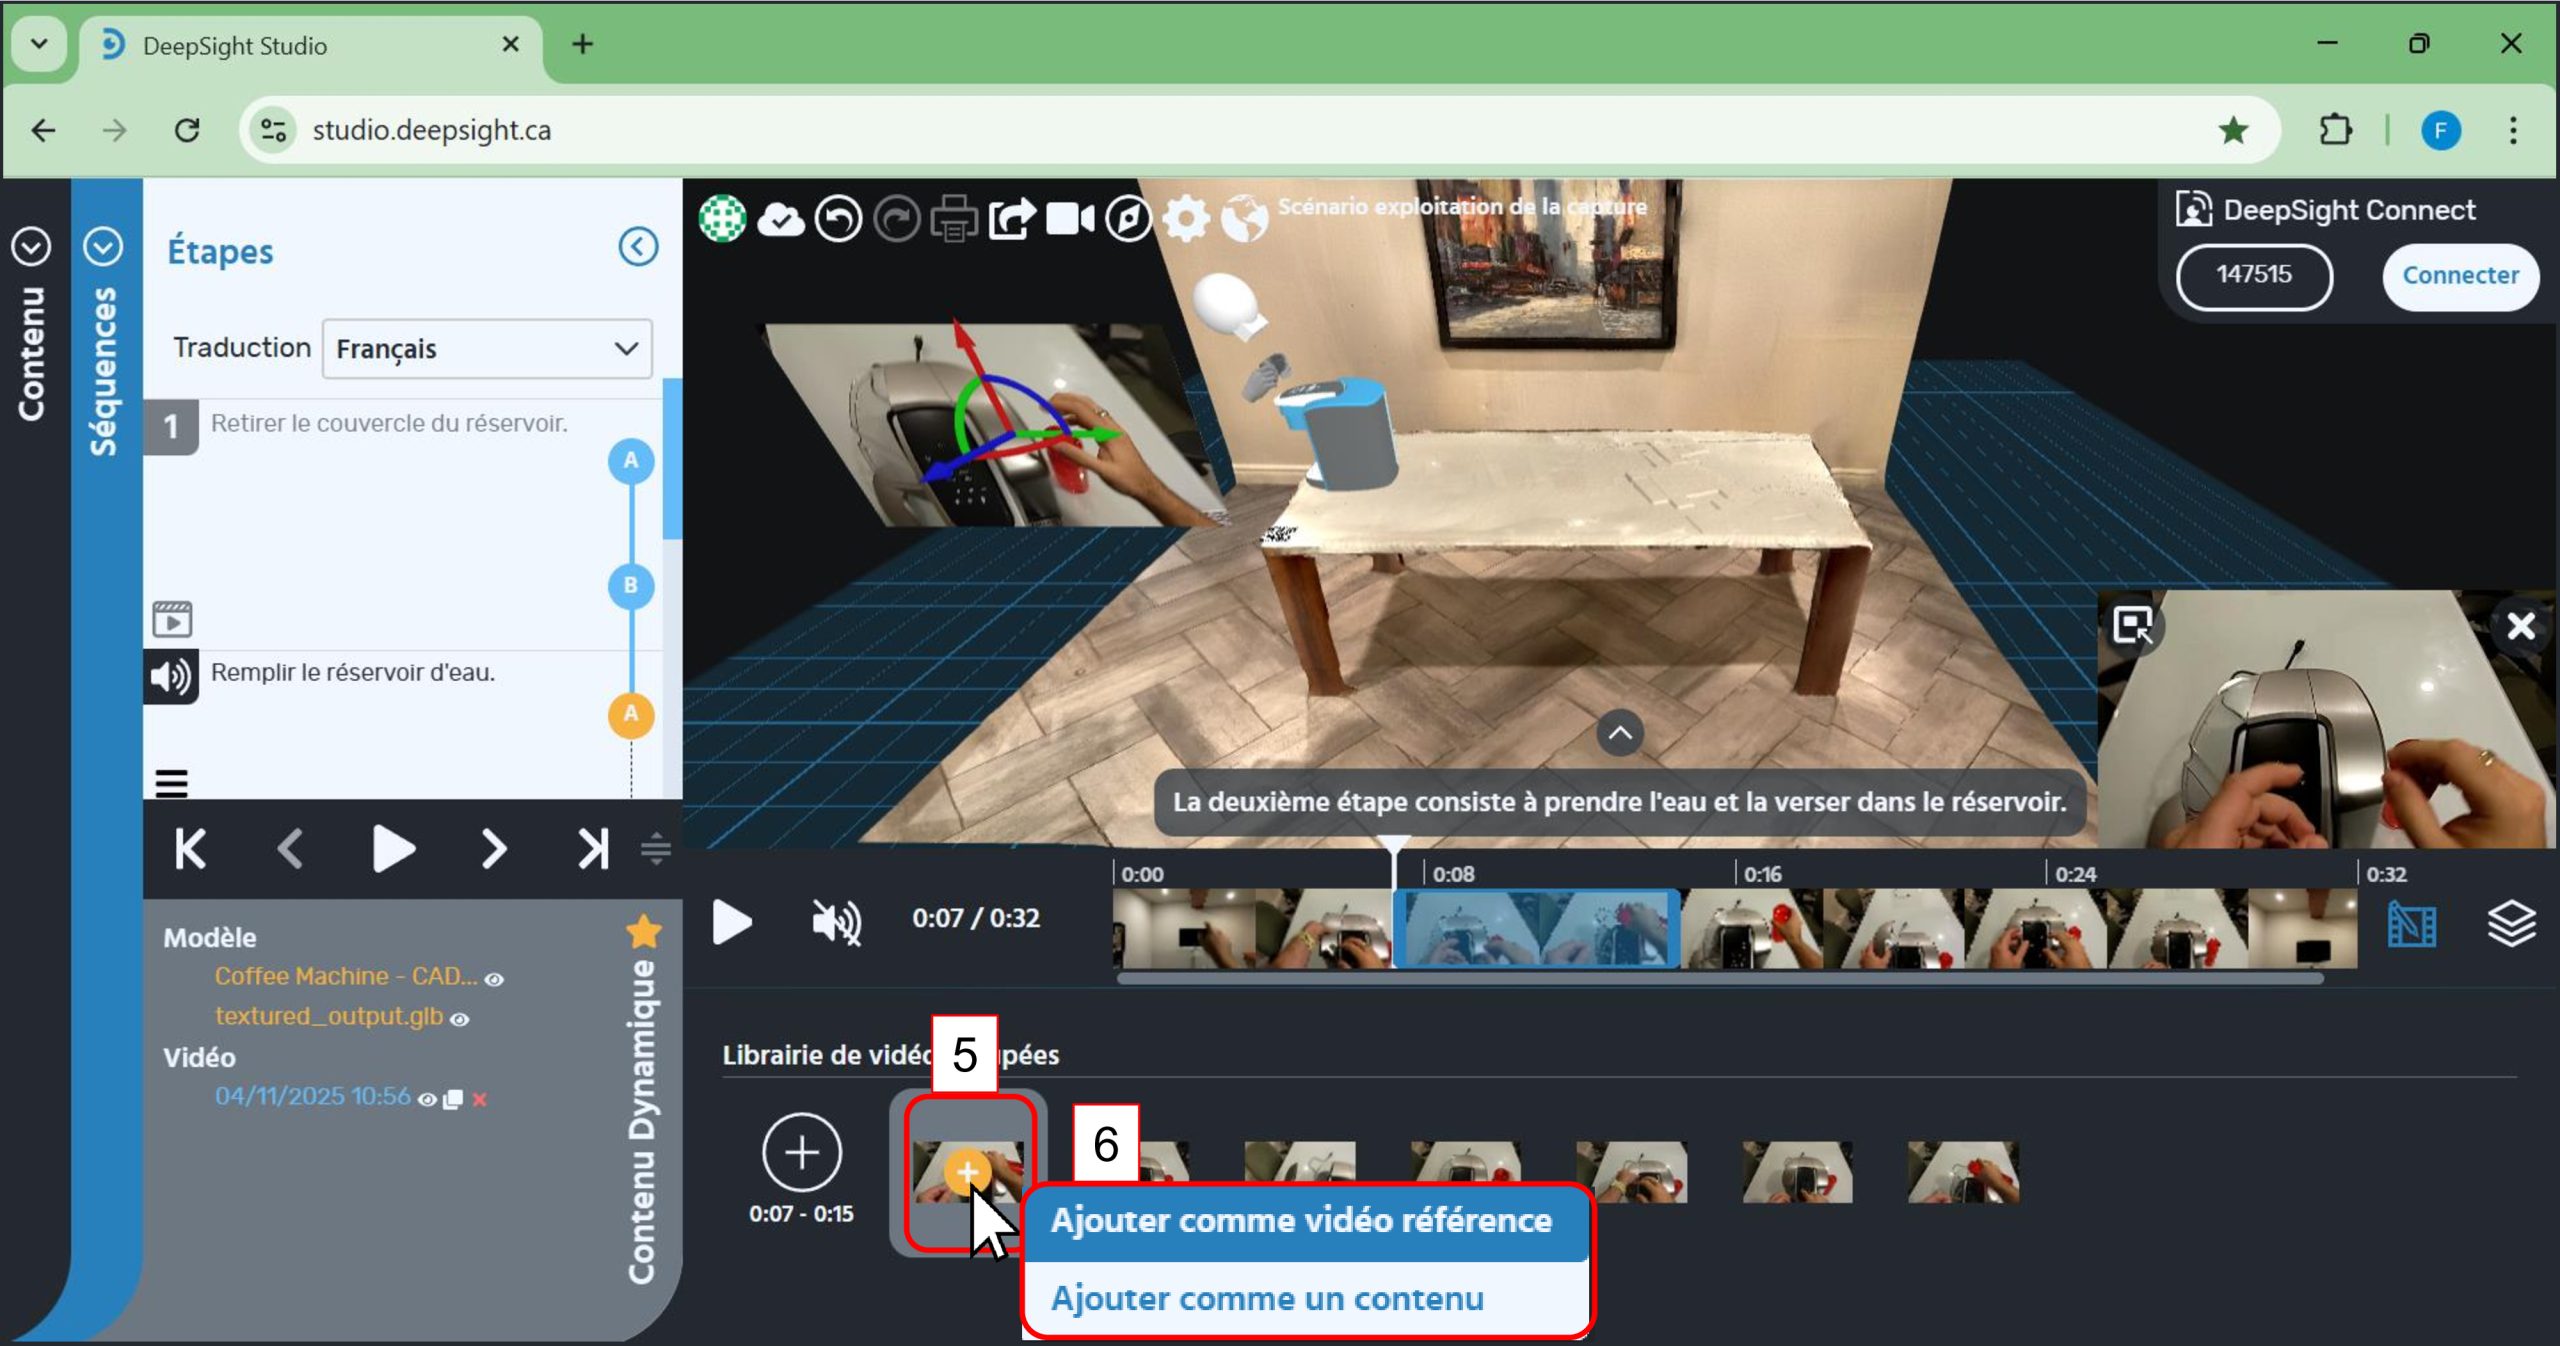
To add this new segment to the step:
-
5. Hover your cursor over the segment. A ‘+’ button will appear—click on it.
-
6. A window will appear offering you two options:
-
-
‘Add as reference video’: by selecting this option, the segment currently assigned to the selected step will be replaced by the new segment you just created.
-
‘Add as content’: the video will be added as content in the world, to the selected step. By moving your cursor within the world, you can place the video segment wherever you want it to appear.
-
- It is also possible to organize video segments to include them later as content in a step.
- To do this: Click on the ‘Sequence’ panel.
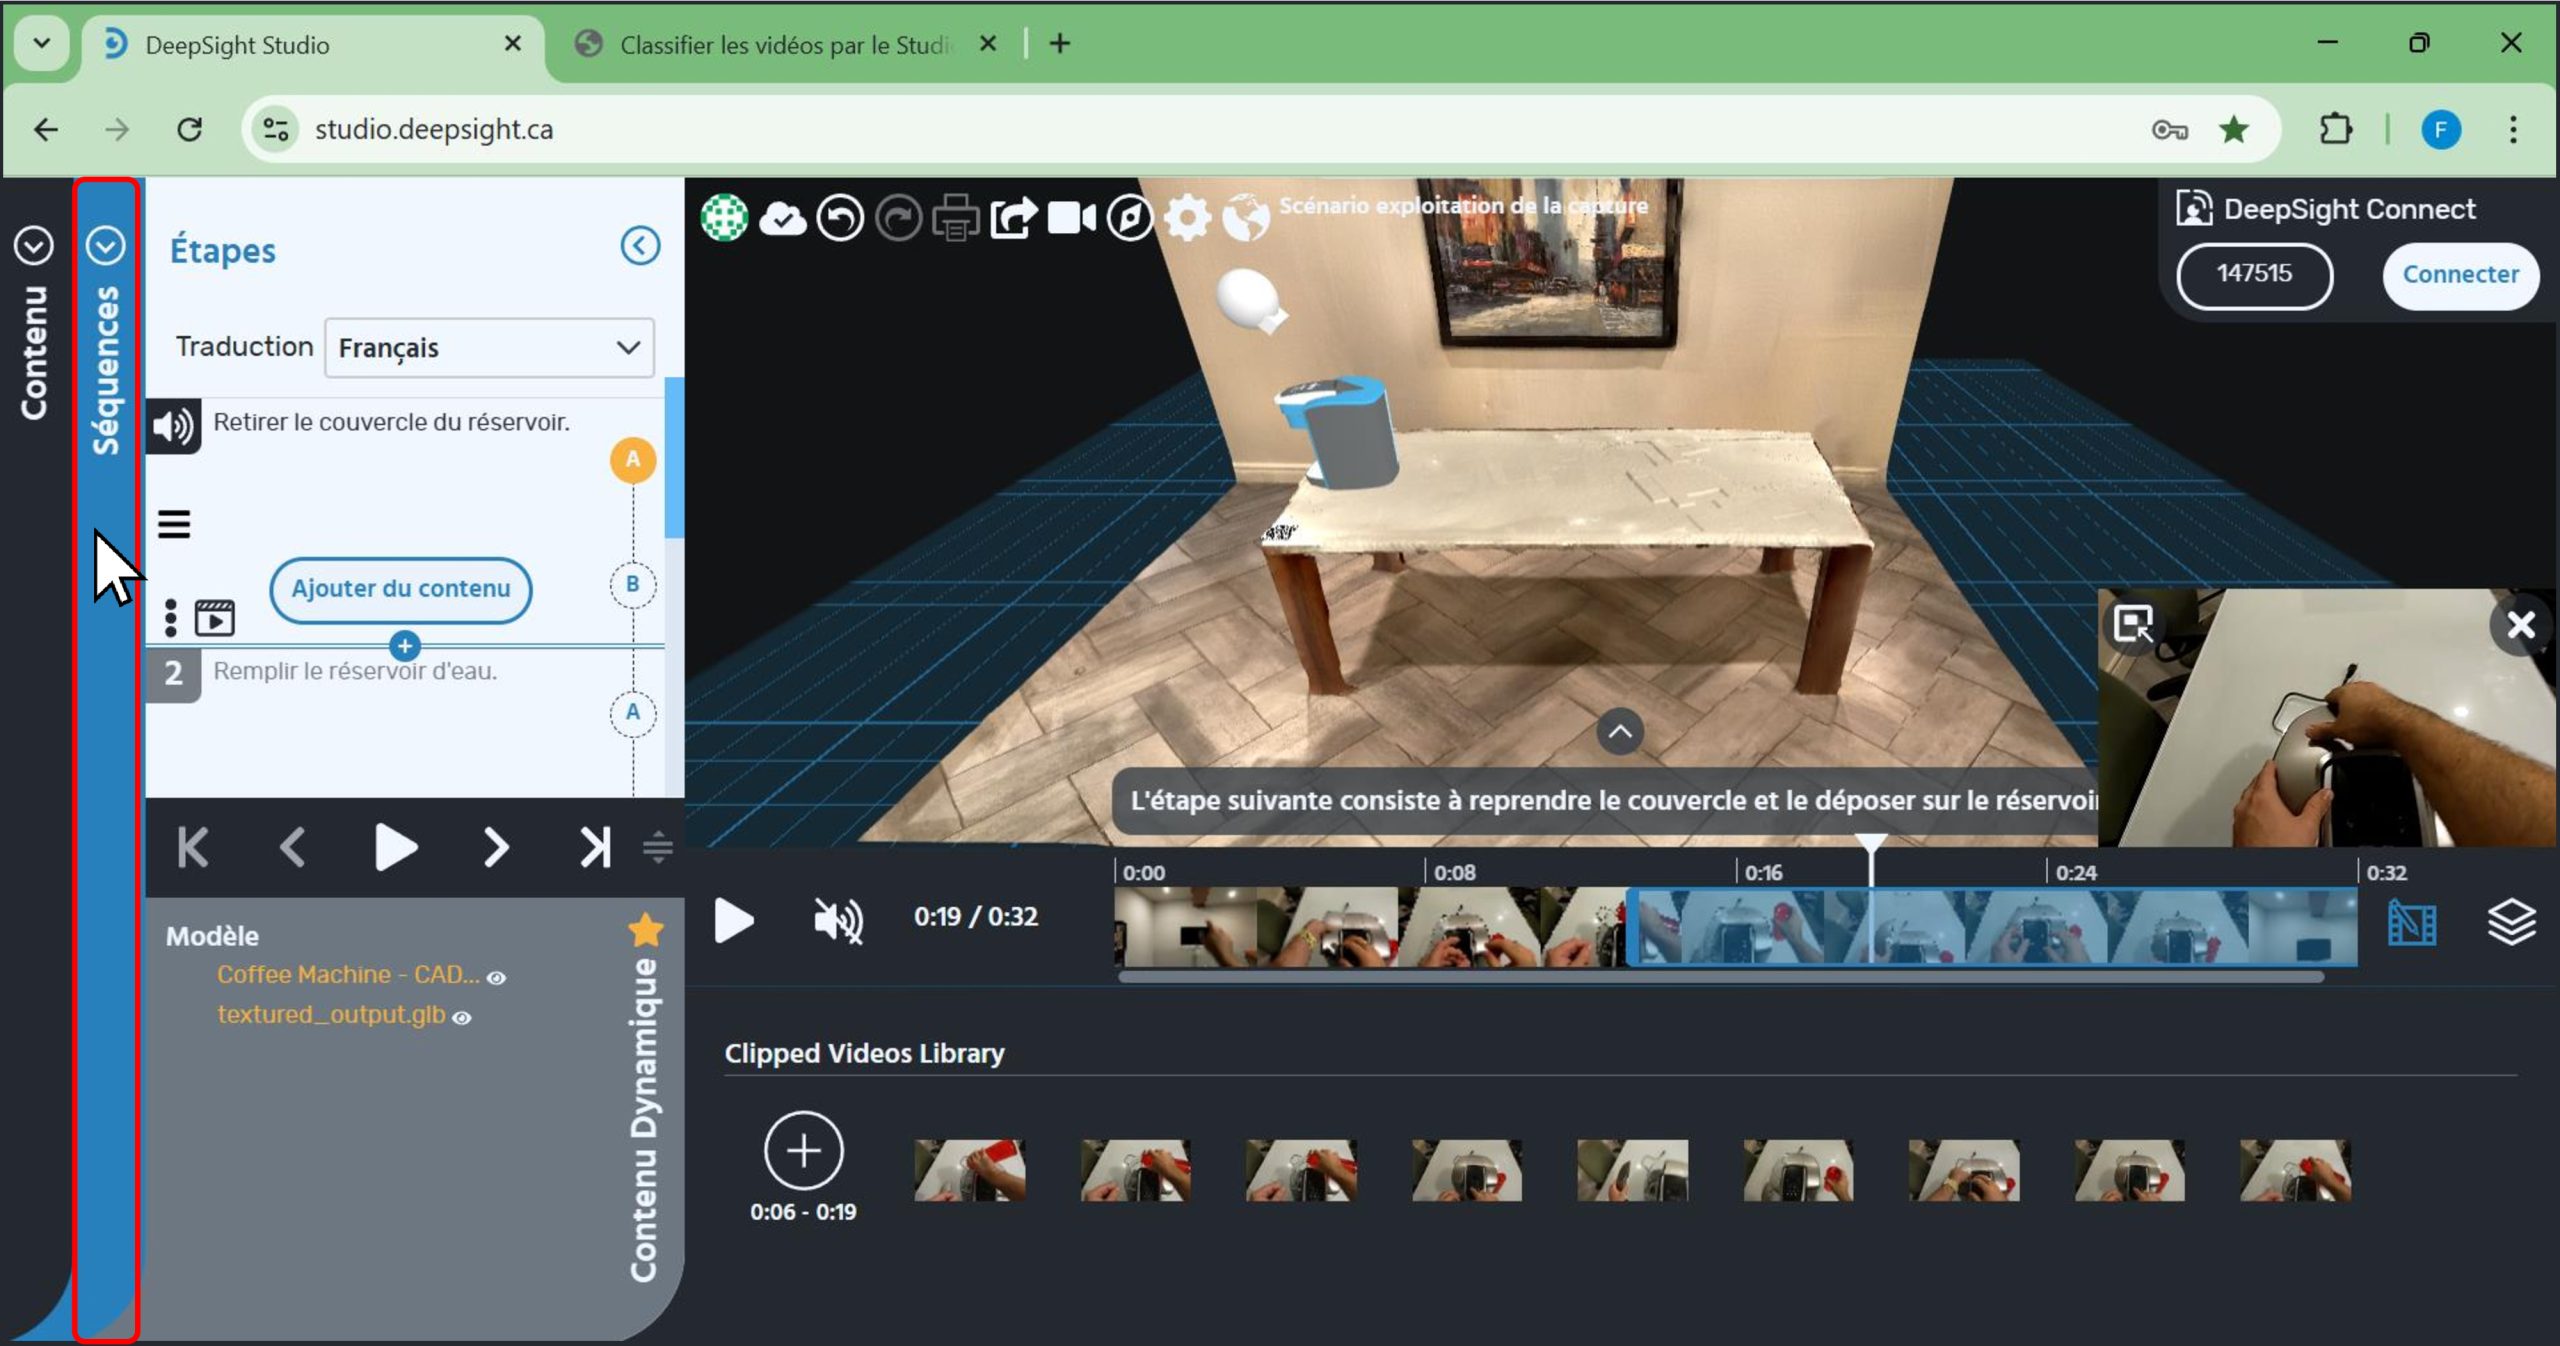
- Click on the ‘Exit Sequence’ button.

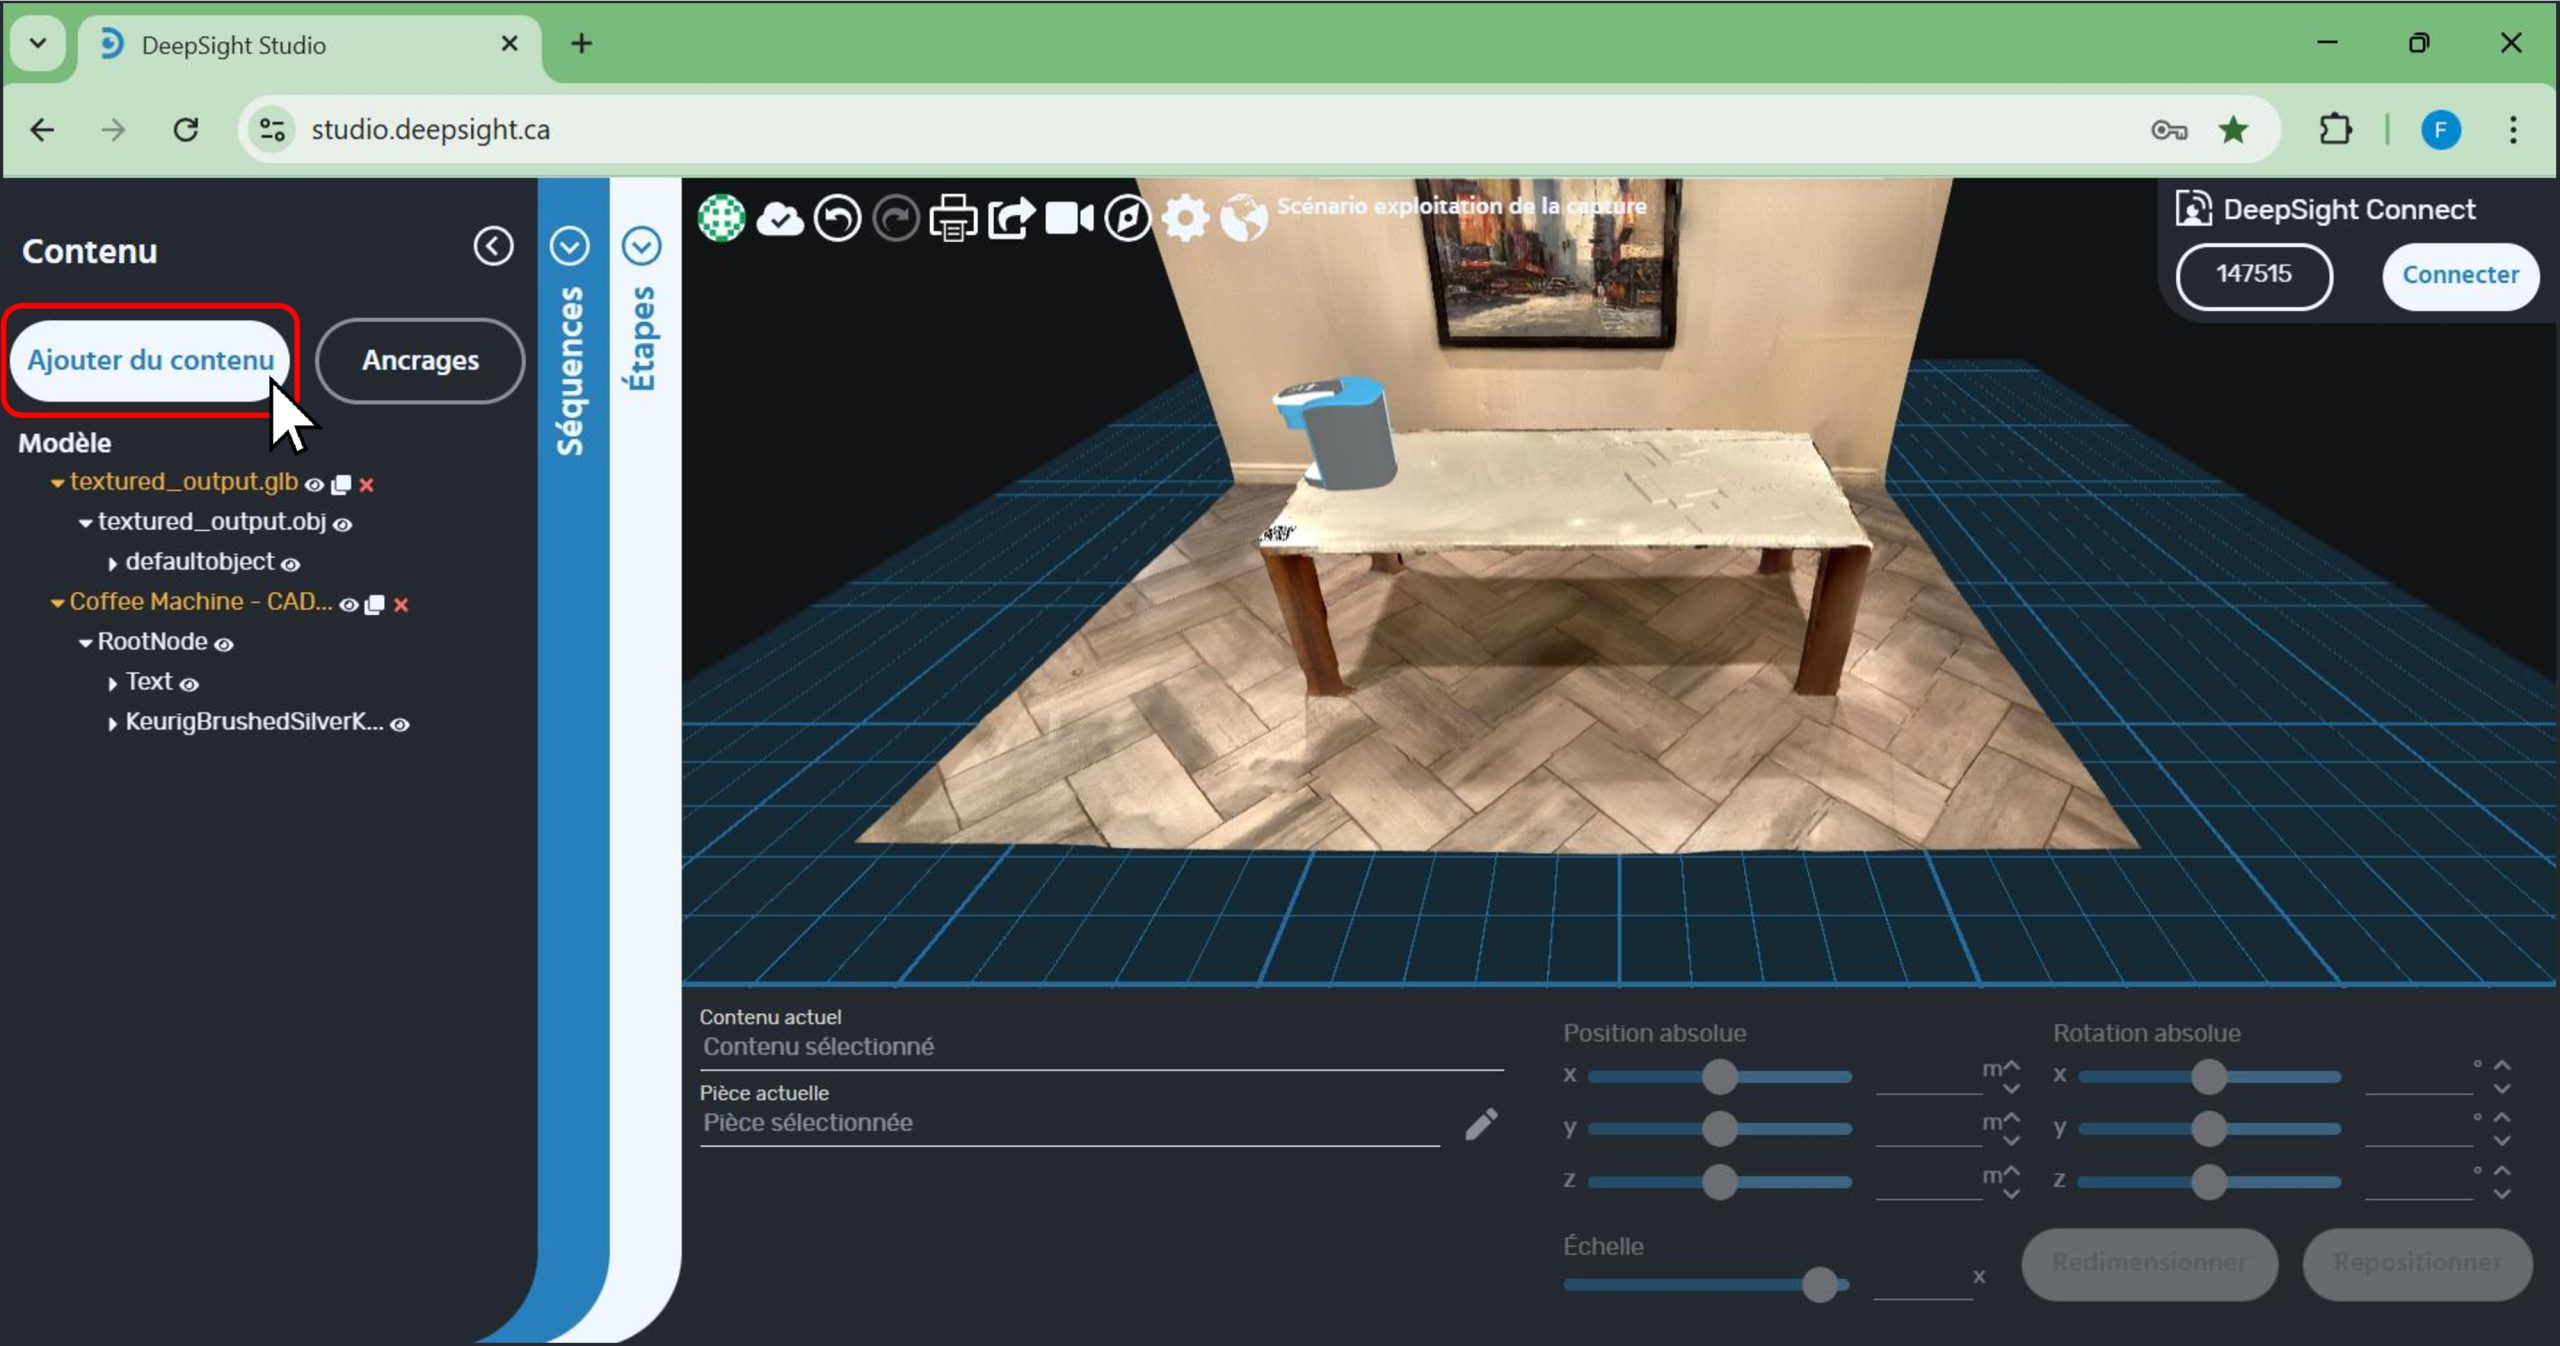
- Click on the ‘Content’ panel.
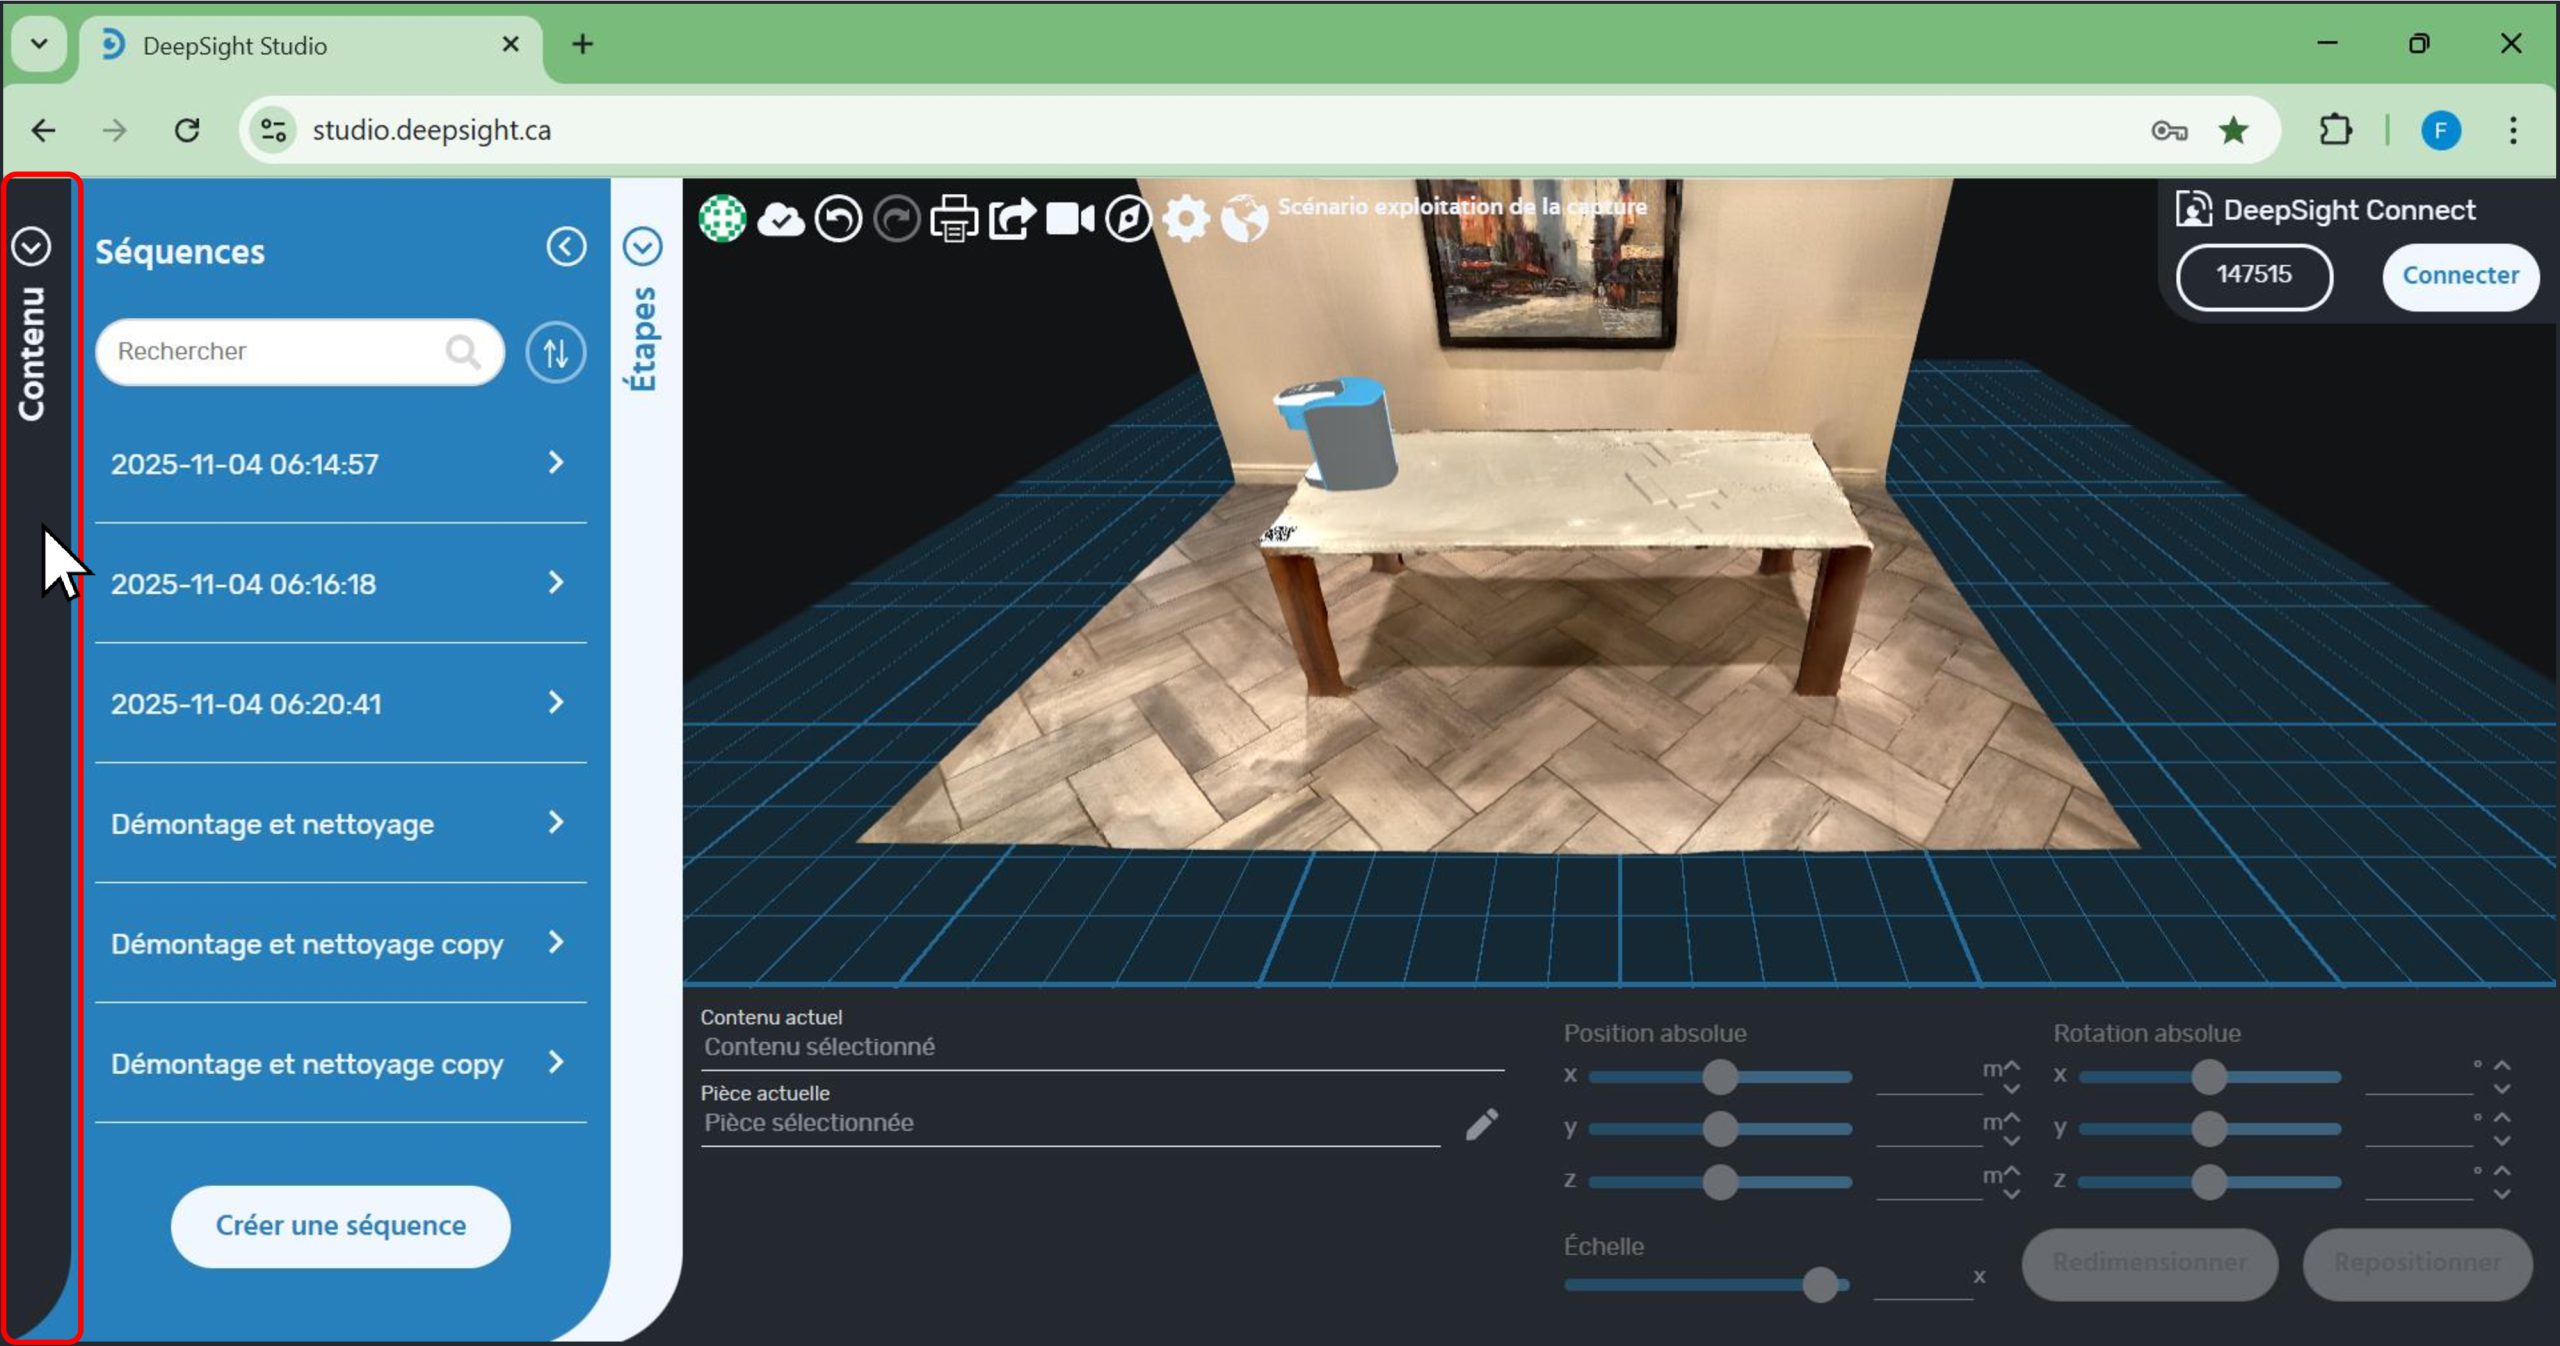
- Click on the ‘Add Content’ button.
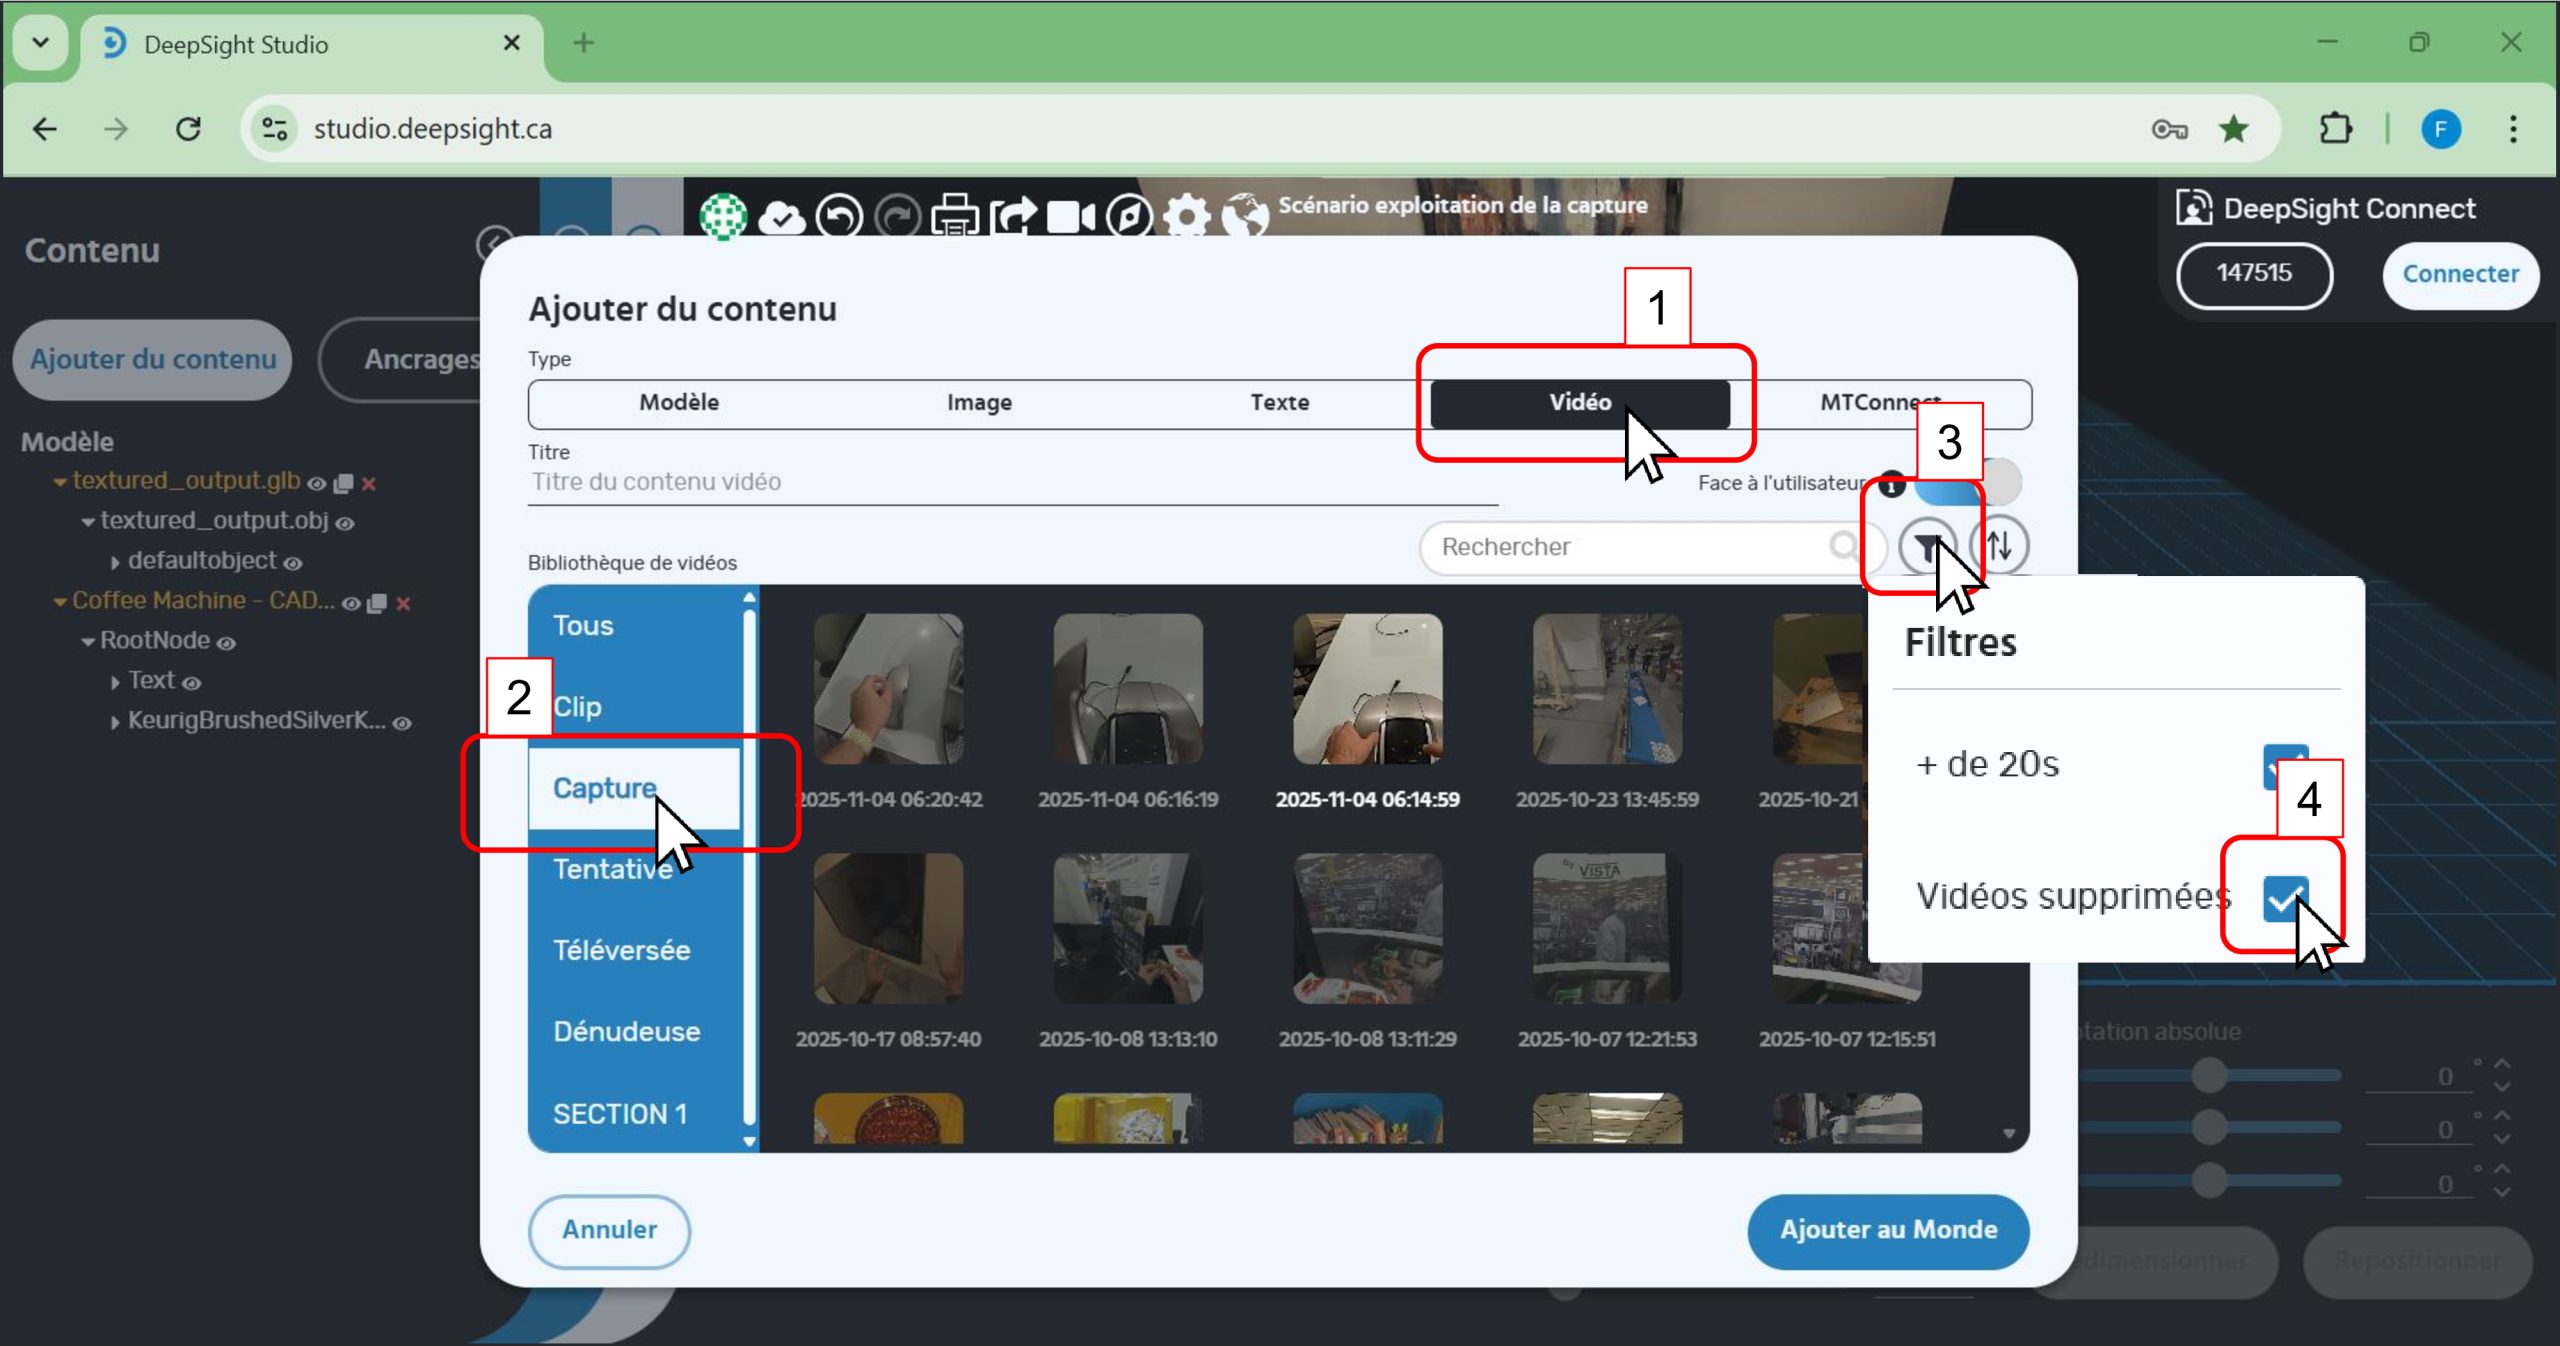
A window will appear.
- 1. Click on the ‘Video’ tab.
- 2. Click on the ‘Capture’ tab.
- 4. Click on the ‘Filter’ icon.
- 4. Deselect ‘Deleted Videos’.
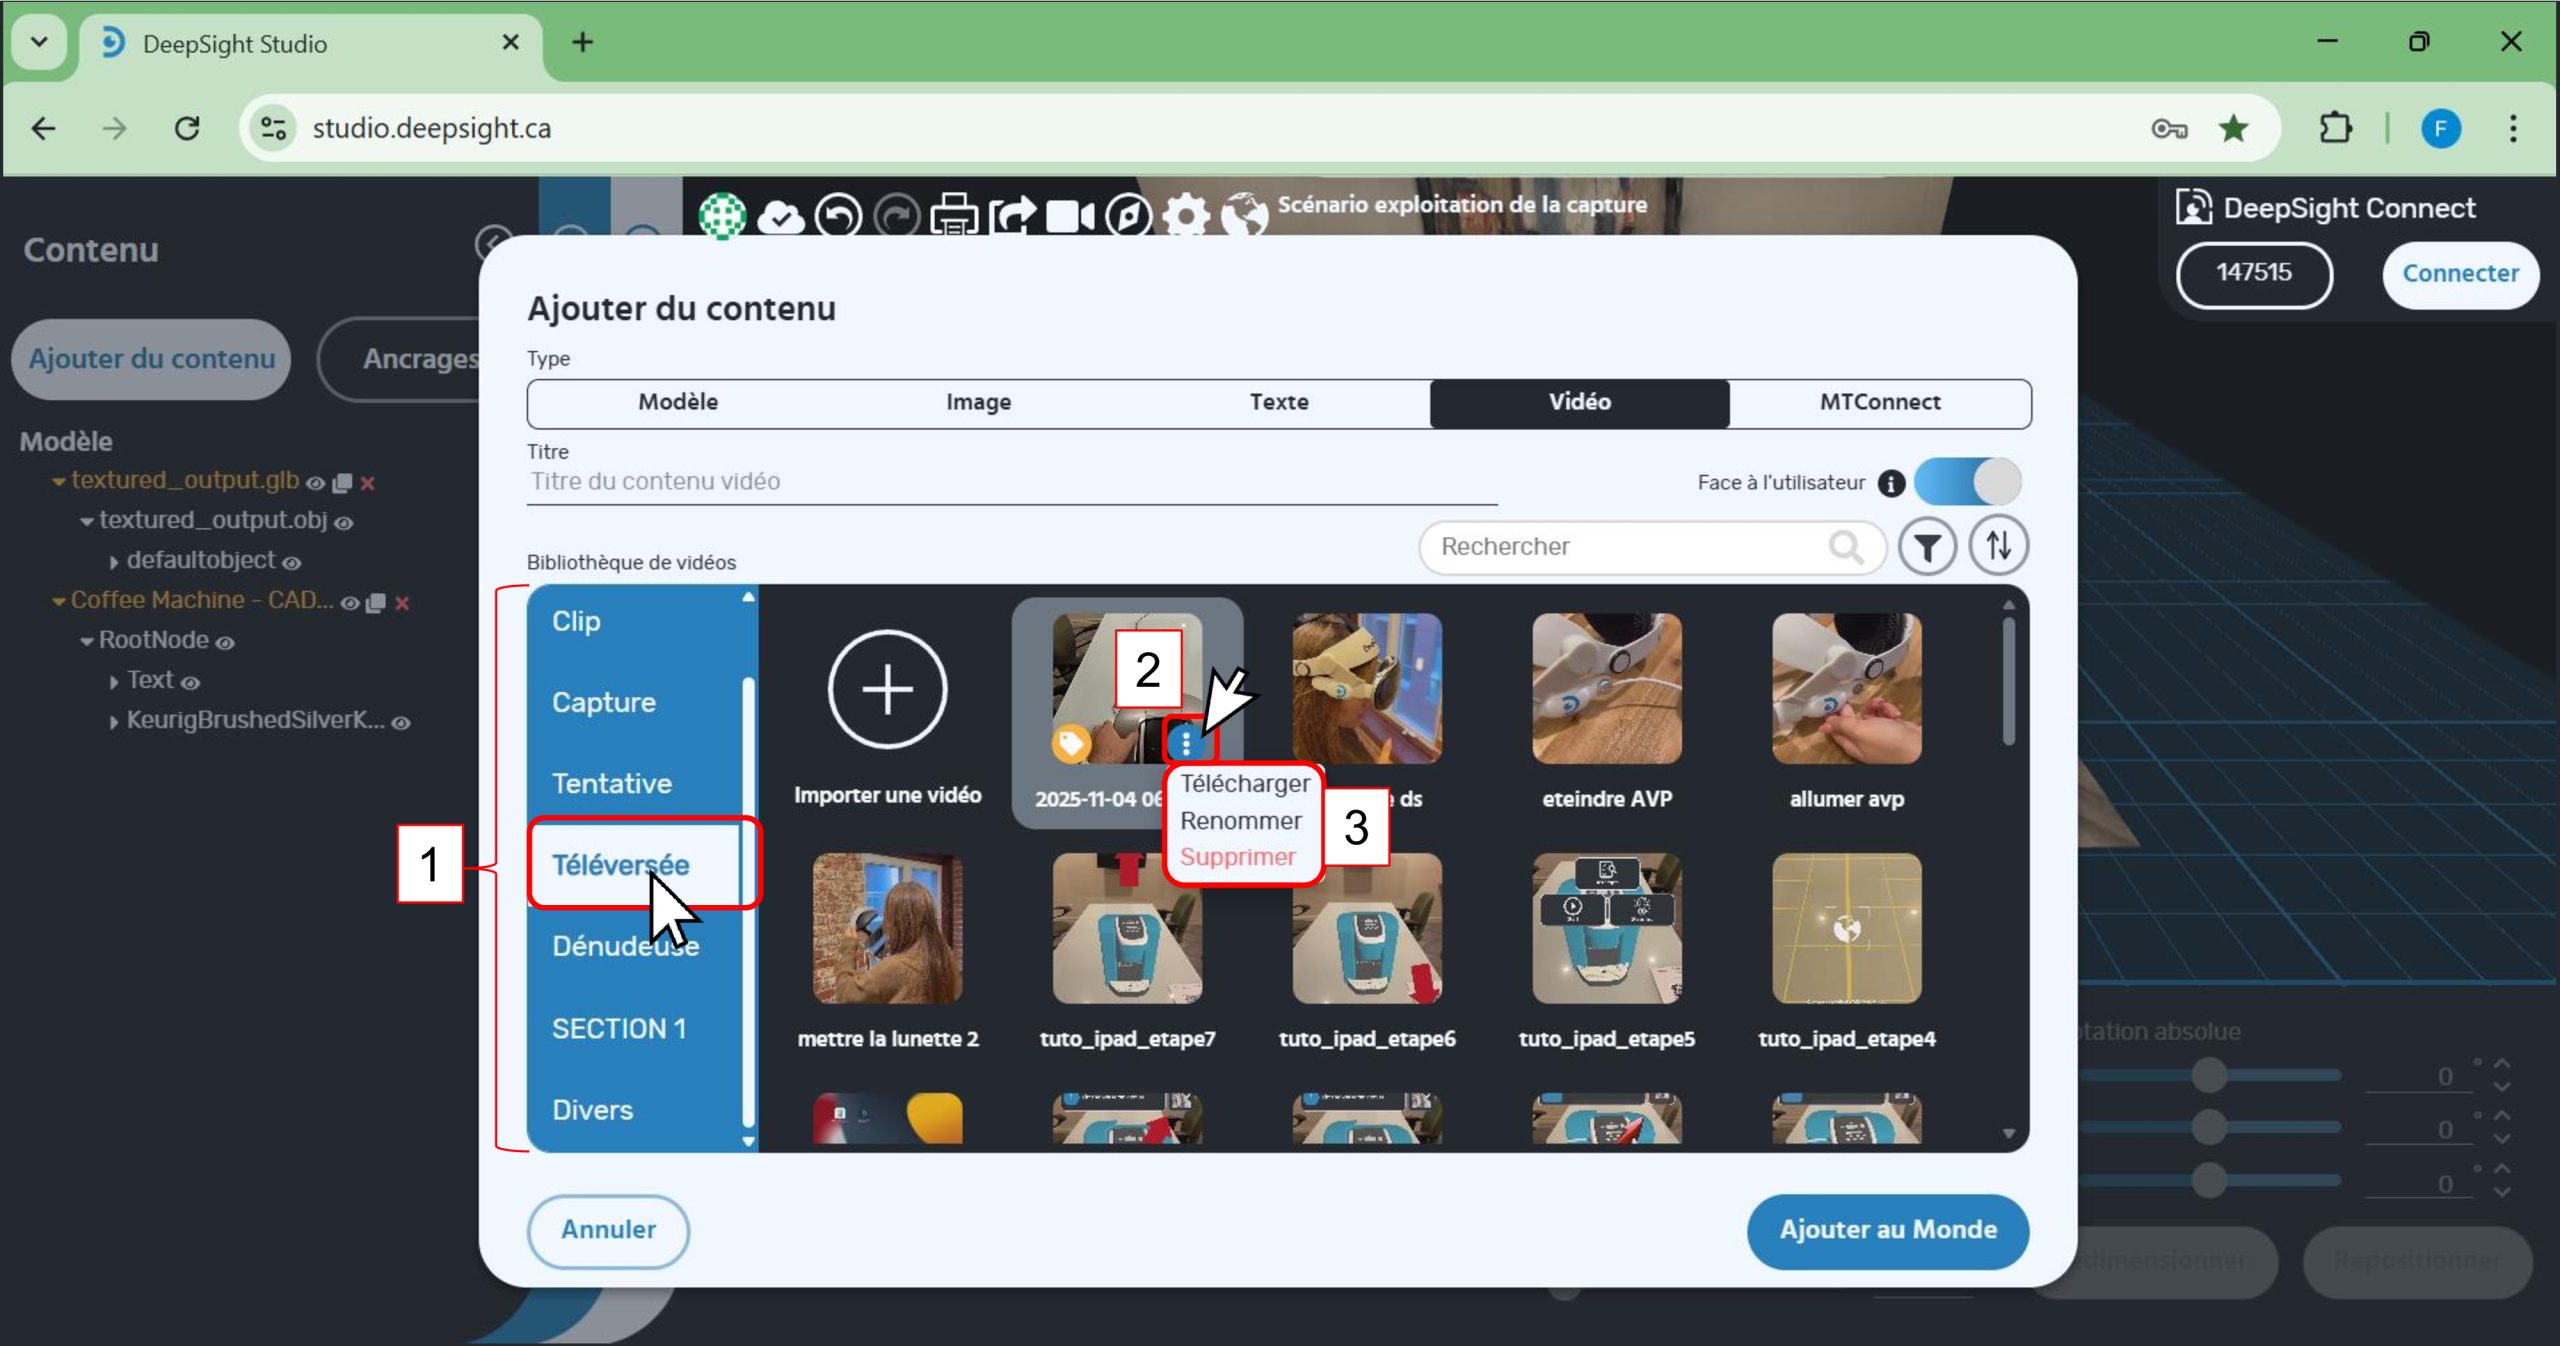
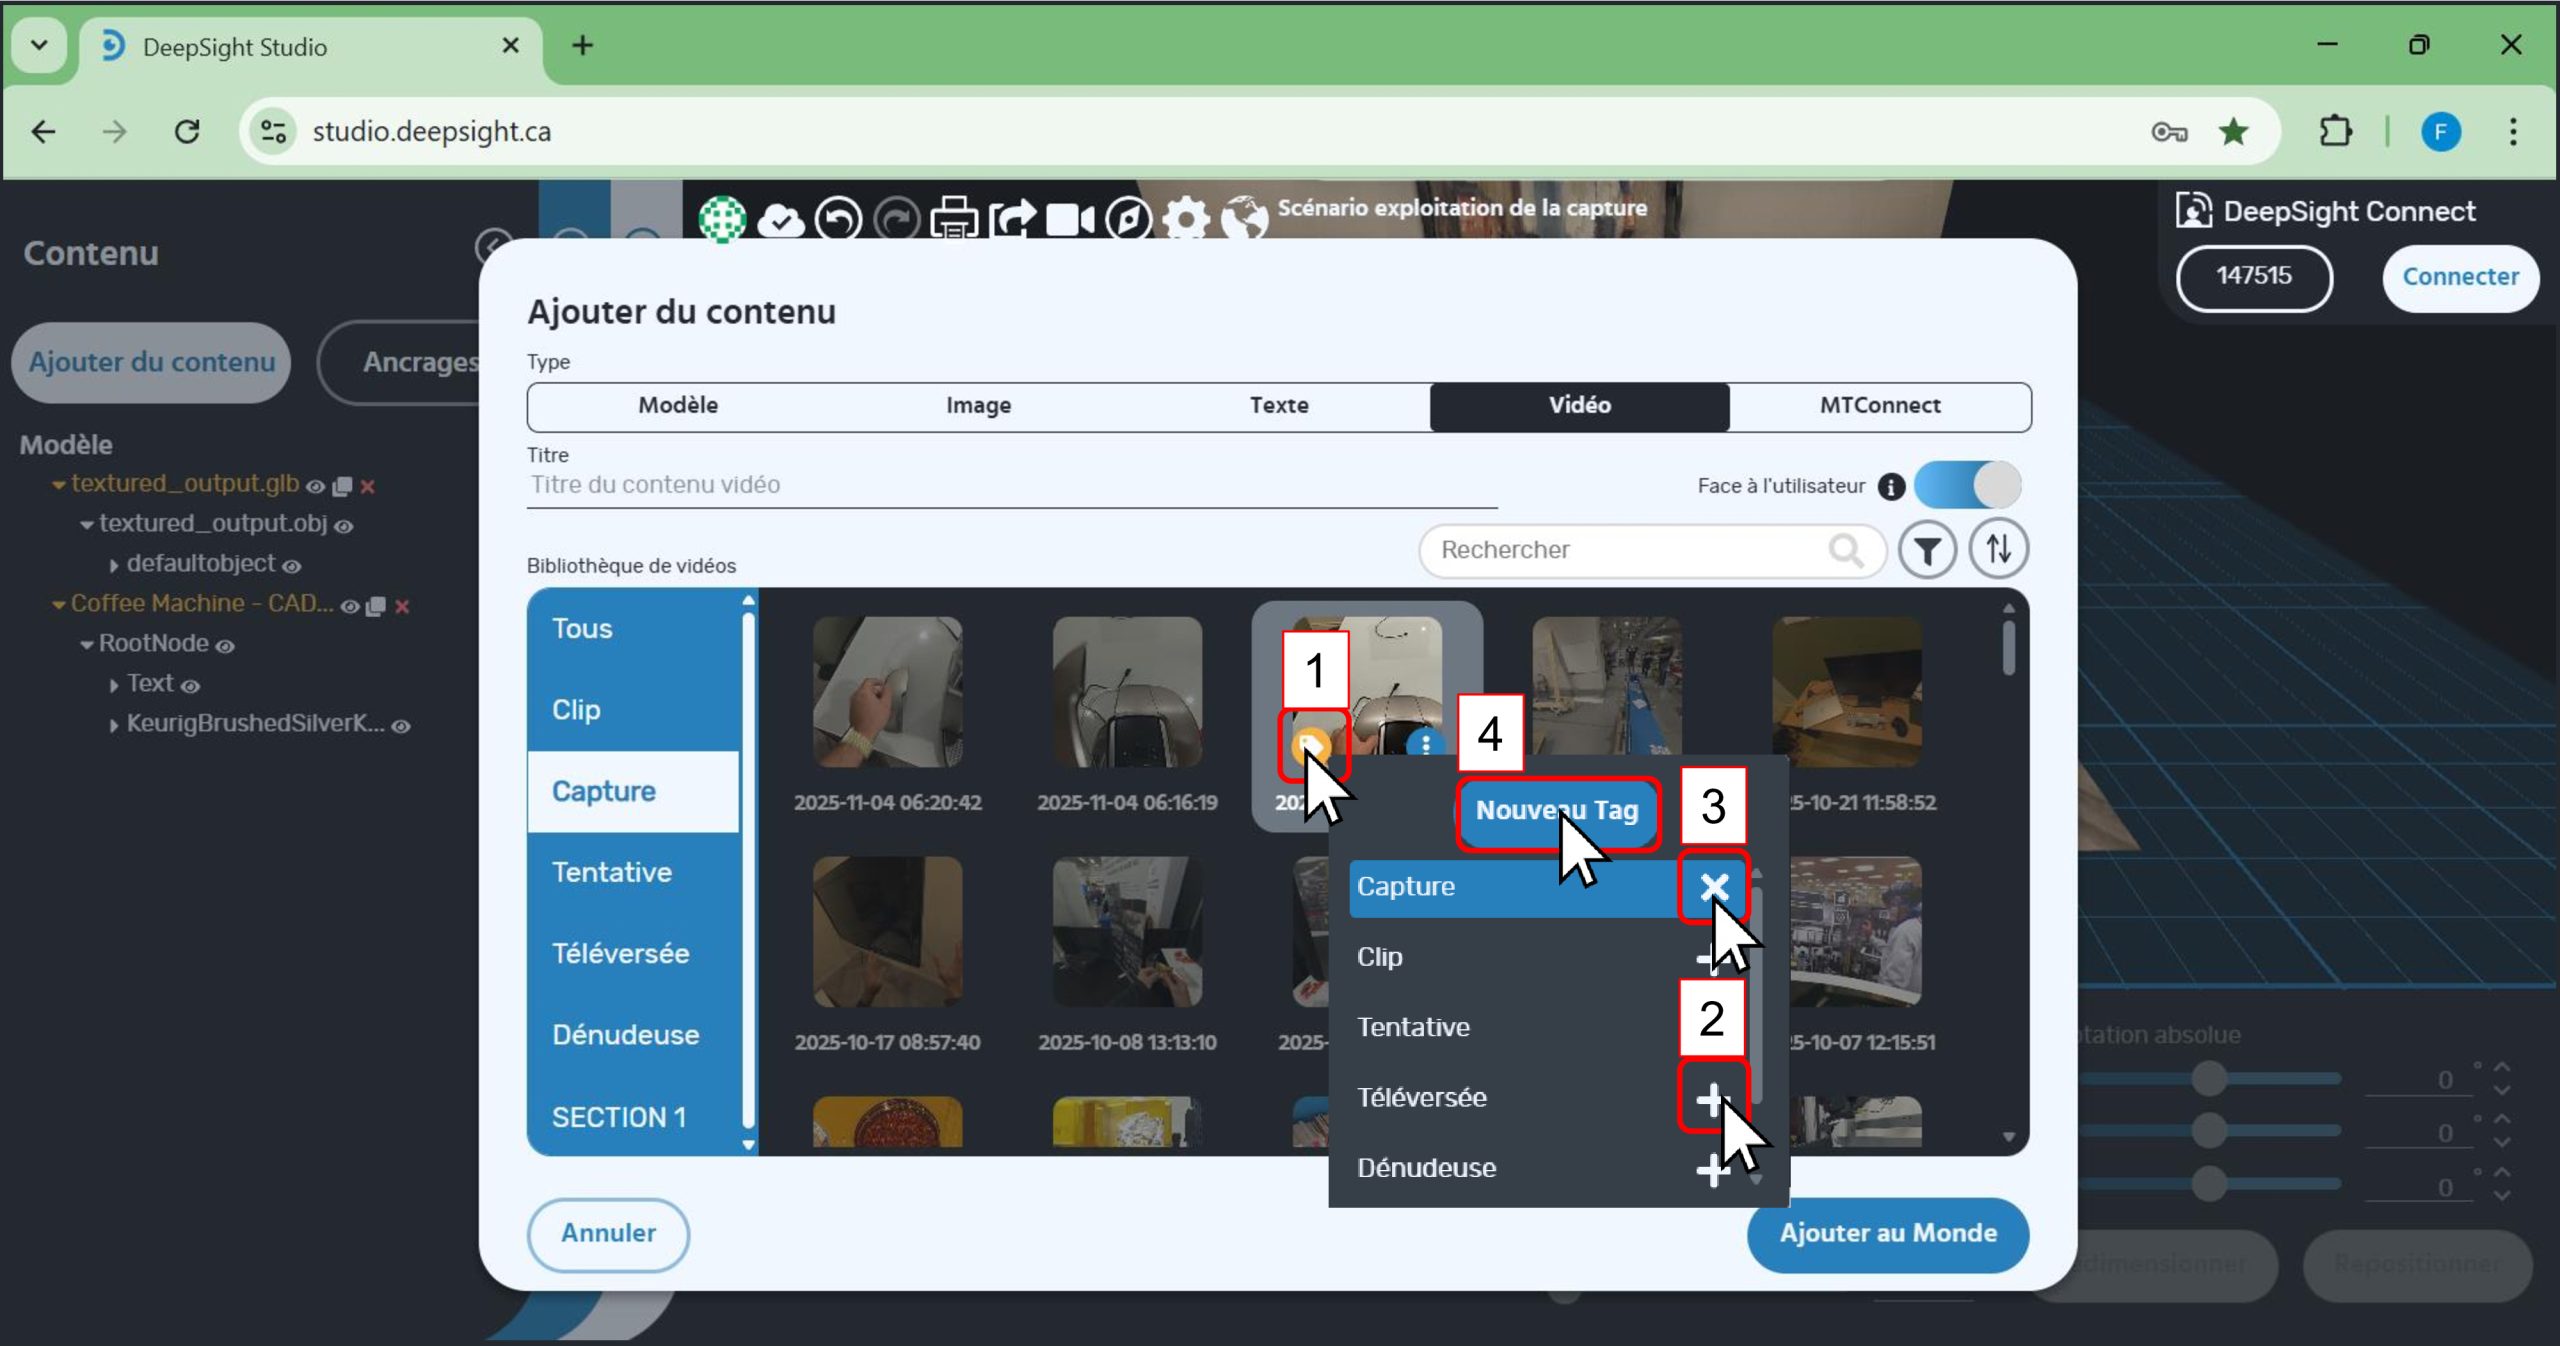
- 1. Click on the yellow label icon of the video segment you want to categorize to assign it to a category (folder).
In this example, you can see that the segment already belongs to the ‘Capture’ category (highlighted in blue). - 2. You can click on other existing categories (here as examples: ‘Clip’, ‘Attempt’, ‘Uploaded’, ‘Stripping’) by pressing the ‘+’ button for that category.
- 3. You can remove the segment from a category by clicking the ‘X’ button for that category.
- 4. If you want to create a new category (folder), click on the ‘New Tag’ button. A text input box will appear where you can type the name of the category you want to create. Save it by clicking the ‘check’ icon to the right of the text input box.
- 1. You will notice that the categories appear in the tabs on the left side of the window.
- 2. The video segment has been added to the ‘Uploaded’ category; it now appears among the other videos assigned to this category.
- 3. It is possible to download, rename, or delete the video by clicking on the ‘three dots’ icon of the video.